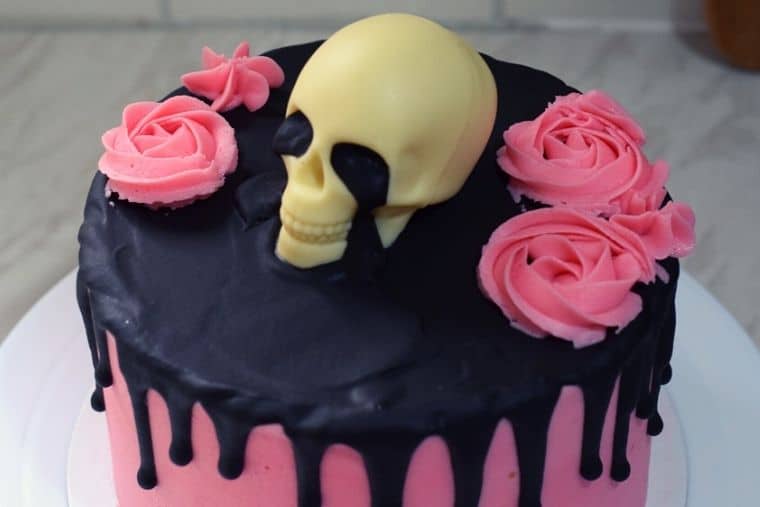
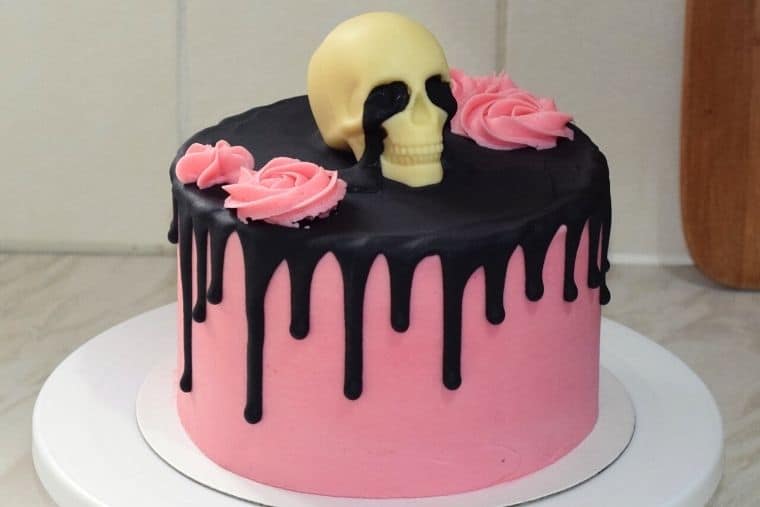
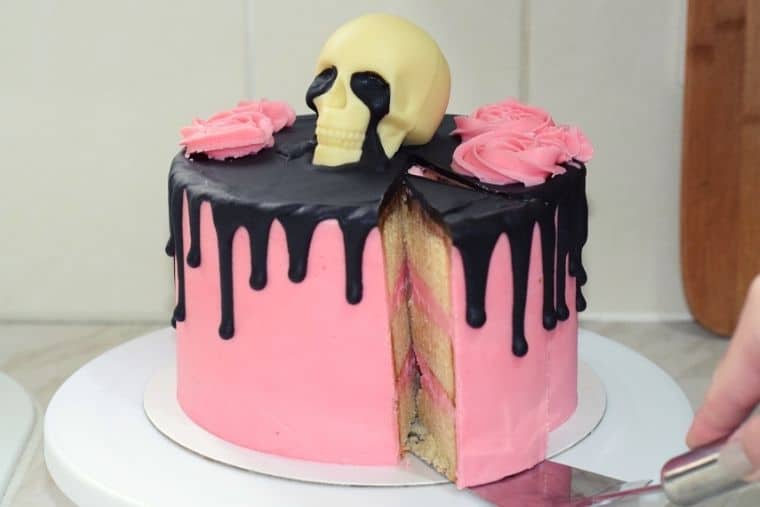
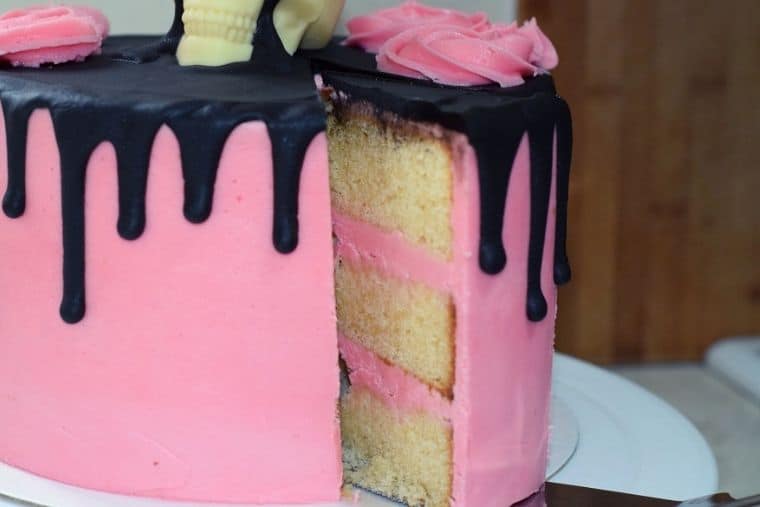
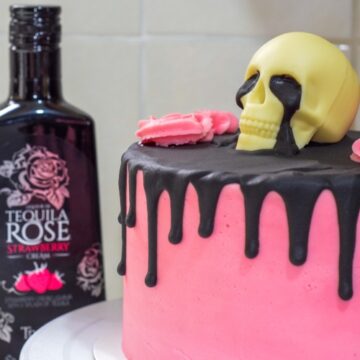
I know right, what a (slightly creepy) beauty? This gluten-free Tequila Rose skull cake is made of three layers of soft gluten-free white chocolate sponge, with a gorgeous Tequila Rose buttercream and a black chocolate ganache drip.
A solid white chocolate skull on top adds that fun gothic twist to an otherwise barbie pink cake. Is it slightly weird that I made a pink cake with black dripping from a skull’s eyes on top? Yes, but I love it anyway and I hope you do too!
It may not be Halloween yet, but this cake would be perfect for your next spooky party or any celebration really!
Jump to:
How do you make a gluten-free cake?
The key thing is to swap your regular flour for gluten-free flour, as the other normal cake ingredients should be gluten-free. However, you need to be careful of cross-contamination, so always check the ingredient labels of your other items.
Types of gluten-free flour:
The easiest option is to purchase a gluten-free flour blend that comes pre-mixed and includes a thickener such as xanthan gum.
Other types include naturally gluten-free flours such as almond flour, cornflour, rice flour and coconut flour. There are also a few more trendy flours you can use such as amaranth, sorghum and buckwheat flours.
Each flour will have a slightly different consistency and texture. I usually recommend buying a pre-mixed blend, such as King Arthur's measure for measure flour or Freee from Doves Farm. They're a lot easier to use and the blends have already been tried and tested for the optimal texture combination.
Common problems when baking gluten-free layer cakes:
So, I originally thought that to make a gluten-free cake, you just needed to swap your regular old flour for gluten-free flour. Seemed simple right? Well, sadly it didn’t work out for me! I tried to make this cake using a version of the recipe below and the middle layer of the cake just buckled under the weight of the layer on top.
To say it was a mess would be an understatement! I tried my best to salvage it and go down to only two layers, but then the bottom layer starting smooshing outwards too.
As it turns out, gluten-free flours lack the structural integrity of regular cake flour, because the gluten is what adds some of the strength and texture. So you need to be more mindful of this when you’re making a gluten-free cake that’s going to have layers, heavy frosting and/or decorations.
Fear not, because if you’re looking to make a gluten-free layer cake, there are some simple ways to help avoid this cake collapse issue. If you follow the top tips below, you’ll have a gluten-free celebration cake worthy of any coeliac-friendly event!
Gluten-free layer cake tips:
- When creating your gluten-free layer cake, overmix the cake batter. Unlike cakes containing gluten, beating your batter for an extra few minutes will actually help to improve the texture.
- After overmixing your gluten-free cake batter, you should then let your cake mix rest for 30mins before baking it. Again, this is the opposite of what you would expect to do when making a cake with gluten. It will allow your flour to have more time to develop structure.
- For gluten-free cake success, you should also bake your cake for longer than you otherwise would. This is because gluten-free cakes tend to contain more moisture to help prevent a dry texture, but it means your cakes will need to cook for longer before they’re done.
🥘 Ingredients notes
- Start with room temperature ingredients. I recommend this for all of my cakes and buttercreams!
- Using high-quality ingredients will make a huge difference in taste. For the white chocolate sponges, I’ve tried using several different brands of white chocolate, and I promise you can tell the difference between a cheap brand and quality baking chocolate. I use Callebaut for this recipe and it’s a delight!
- I'd always recommend using vanilla extract over vanilla essence where possible, as it has a much purer vanilla flavor.
- Always sieve your flour, confectioners sugar (also called icing sugar or powdered sugar) and baking powder. I used to be a bit lazy and skip this part, but it really makes such a difference to get you a lump-free cake batter.
- When measuring your ingredients, I always recommend using weights rather than cups where possible for greater accuracy. This is especially important for the amount of flour.
🔪 Equipment notes
- I like to use digital scales for weighing my ingredients as it's easier and more accurate than other scales. I'm a fan of KitchenAid or Salter ones!
- It’s also good to use measuring spoons for your teaspoon and tablespoon amounts, as your standard teaspoon and tablespoon that you use to eat with won't be the correct volume. When using measuring spoons, make sure the scoops filled with your ingredients are levelled before adding them to your mix.
- When icing your tall layer cake, using a cake turntable is a lifesaver! It's so much easier to get smooth sides and top when you use a cake scraper (or bench scraper) and an offset spatula.
🍱 Storage
- Once decorated and finished, it's best to place your tequila rose drip cake into an extra-large airtight container. Your cake should keep for up to 3 days stored at room temperature.
- If it's hot where you live (lucky you!), you may want to store your cake in the fridge instead. It should last up to 4 days in the fridge, but this may dry it out slightly so cover it well.
- If you want to freeze your cake, you can wrap the unfrosted white chocolate sponge cake layers in plastic wrap / cling film and then a layer of aluminium foil then freeze them.
- Your buttercream frosting can also be frozen in an airtight container. Both should keep for 1-2months in the freezer. Defrost and use as normal per recipe. The buttercream may need to be beaten again to whip up to nice and fluffy before use in frosting your cake.
- I’m a pretty busy person, and I’m sure you are too! So, if you’re short on time, I recommend making the white chocolate cake sponges in advance. You can bake the sponges 1-2 days before use and keep them wrapped up in cling film/plastic food wrap in the fridge. This is a pretty moist recipe so your sponges shouldn’t get a chance to dry out.
💭 Top tips for success
So, gluten-free adjustments aside (see above gluten-free section), if you’re looking to make your Tequila Rose skull cake a hauntingly beautiful and delicious dream, then read the following tips to ensure success:
Cake baking tips:
- Don’t open the oven mid-bake. You’ll have probably heard this advice before, but it’s such an important factor that it bears repeating. I’ve been there before and nobody likes a cake with a sinkhole!
Tequila Rose buttercream frosting tips:
- For a perfectly light and fluffy Tequila Rose buttercream, be sure to beat your butter for a long time to start with. This should take several minutes using a stand mixer and it should turn your butter pale and light.
- When using food dye to colour your buttercream and ganache, it’s best to use food gels or oil-based food colouring. This will add less liquid so as not to affect the texture of your buttercream and ganache.
- The food colouring will also develop and the colour will strengthen over time, so add a little bit less colouring than you think and stop when the colour is a little less intense than you want the final colour to be. When making the black ganache, you’ll need quite a lot more food colouring than you would to colour your buttercream pink.
Chocolate skull decoration:
It’s not yet Halloween, but a skull makes everything just a little more badass. For the skull decoration on this cake, I used this 3D skull ice-cube mould and it worked a treat (an affiliate link, but it's just a cheap mould that really worked!). Or you can look for another similar large 3D skull mold.
For an almost solid chocolate skull using this mould, I used roughly 125g of white chocolate. If that’s a bit much for your tastes, you can try using only 80g and every few minutes for the first 15minutes, swirl your chocolate around the mould so that it coats all sides.
If you’re choosing to make a chocolate skull for your cake decoration, be patient! It can take a while for your skull to set. For an almost solid skull, I like to set mine in the refrigerator for 45mins minimum.
Troubleshooting help:
If you’ve got any specific questions on making your very own tasty skull-themed gluten-free white chocolate cake with Tequila Rose buttercream, please feel free to leave a comment below and I’ll try my best to help out!
Alternatively, you can get in touch via my Facebook, Instagram or Pinterest – I’d love to hear from you!
♻️ Alternatives and substitutions
As mentioned above, you don’t need to have a solid chocolate skull on your cake, or any skull at all really! This delicious white chocolate cake would be just as beautiful piping more of the buttercream frosting roses across the top, either in a circular ring or covering one side of the top.
Tequila Rose is a strawberry cream liquor, and it’s delicious! But if you’re not a big fan of the flavour, you can swap this for another alcohol such as Chambord or Bailey’s strawberry and cream.
This recipe calls for a gluten-free plain flour blend, but instead you can swap this for a gluten-free self-raising flour blend and exclude the baking powder from the recipe.
🧁 Other goodies
So, I definitely recommend that you get cracking on making this gluten-free tequila rose skull cake! But as an avid home baker, I’m sure you’re asking yourself “what next?”.
Well, if you love a drip effect cake, why not take a look at my recipe for an Oreo drip cake or Biscoff drip cake - both make amazing celebration cakes!
Or if you’re a huge fan of a boozy baking idea (I know I am), then check out my recipe for a no-bake Baileys Irish cream cheesecake. or my best ever gluten-free whiskey almond cookie bars.
Feeling a bit spooky? Why not check out my recipe for scary unicorn cakesicles or a poorly pumpkin patch drip cake?
Looking forward to some new recipes? Check out my Facebook, Instagram and Pinterest pages for a few sneak peeks and some sweet inspiration!
Or if you’d like to hear about our latest recipes, why not subscribe to our newsletter?
📖 Recipe
Gluten-Free Tequila Rose Skull Cake
Rate this recipe here:
Equipment
- 3D skull mould
Ingredients
Sponge Cake:
- 235 g (1 cups) unsalted butter
- 300 g (2¼ cups) white chocolate
- 200 g (1 cups) caster sugar (golden or white)
- 260 ml (1 cups) milk (semi-skimmed or whole)
- 2 eggs
- 2 teaspoon vanilla extract
- 350 g (2¾ cups) gluten-free blend plain flour (see notes for self-raising flour swap)
- 3 ½ teaspoon baking powder
Tequila Rose Buttercream:
- 350 g (1½ cups) unsalted butter (room temp.)
- 720 g (6 cups) icing sugar
- 75 ml (6 tablespoon) Tequila Rose
- 2-4 drops pink food colouring gel
Chocolate Ganache Drip:
- 70 g (½ cups) dark chocolate
- 70 g (¼ cups) heavy cream (e.g. double cream)
- 6-9 drops black food colouring gel
Chocolate Skull (optional):
- 125 g (1 cups) white chocolate
Instructions
Sponge Cake:
- Add the butter, white chocolate, sugar and milk to a saucepan, and heat on a medium heat, stirring until the sugar has dissolved and the mixture is completely melted and smooth. Turn off the heat when ready and set this to one side.
- Beat the eggs and vanilla in a large mixing bowl until fluffy, then slowly pour in the slightly cooled chocolate mixture, beating until smooth.
- Sieve in the flour and baking powder, beating this in for several minutes (over-mixed by normal standards).
- Pre-heat oven: 180°C / 160°C (fan) / Gas Mark 4 / 350°F
- Leave the cake mix to rest for 30mins before splitting evenly across three 6inch (or two 8inch) lined cake tins.
- Bake for 35-40mins until golden and skewer comes out mostly clean from the centre, then allow to cool on the side. If using a chocolate skull, start making this while the cakes bake. While the cakes cool, make the buttercream.
Chocolate Skull (optional):
- Slowly melt the ¾ of the white chocolate in the microwave, 30 secs at a time, stirring between each round until melted.
- Add the remaining ¼ of the white chocolate and keep stirring until completely melted and smooth.
- The 3D skull mould should have two halves. Pour the chocolate into the face down part until it's just below the sides, then close the other half on top.
- Pour the remaining chocolate through the hole in the mould. Hold your finger to the back of the hole to seal it and then swirl the chocolate around so it coats all the sides and back of the mould.
- Place the filled mould into the fridge to set for at least 45mins. While this sets, make the buttercream.
Tequila Rose Buttercream:
- Beat the butter (either by hand, using an electric mixer or stand mixer) until pale, light and fluffy. This could take several minutes.
- Sieve half of the icing sugar into the butter and beat until combined, then repeat this with the remaining half of icing sugar.
- Once fully combined, add the Tequila Rose and beat until just combined and smooth.
- If using, add the pink food colouring and mix until the colour has spread evenly.
Assembly:
- Set aside for later roughly ⅙ of the buttercream into a piping bag for the roses on top.
- Once the sponges have cooled completely, cut off any peaks to give smooth flat tops on your layers.
- Spread a thick layer of the buttercream onto one sponge and sandwich a second sponge layer on top.
- Add another thick even layer of buttercream on top of the second sponge, and then place the third sponge upside-down on top of this.
- Smooth a thick layer of buttercream on top of the cake and around the edges, smoothing and scraping until your cake has a relatively thin and neat outside coating. Refrigerate for 15mins.
- Add the remaining buttercream to the top and outside of the chilled cake, smoothing this using a spatula for the top and scraper for the sides.
- Put the cake back into the fridge while you make the ganache.
Chocolate Ganache Drip:
- Heat the cream over a double-boiler or in the microwave (20 secs at a time), until hot but not boiling.
- Break the chocolate up into pieces and pour the hot cream over it. Let this sit for 5mins and then stir until smooth.
- Allow the ganache to cool at room temperature for 10-20mins, until the ganache is still runny but has cooled and thickened slightly.
- If using, add the black food colouring and stir through until the colour is dark and spread evenly. The colour will also develop and darken over time.
- Remove your cake from the fridge. Dip a teaspoon into your ganache and test a drip at the top edge of your cake. If this creates a thick line and only runs partway down the side, you’re good to go. If it hits the bottom, refrigerate your ganache for 5mins and try another test drip. If your drip hardly runs at all, microwave for 10 secs. Repeat until your test drips are to your liking.
- Once you have the right consistency, drip ganache from your spoon at the edges of your cake until you have enough drips around your cake.
- Keep back roughly 2tbsp worth of the ganache, and use the rest to fill in the middle of your cake top, smoothing gently with an offset spatula until you get an even layer.
Decorations:
- If using, carefully remove your white chocolate skull from the mould and place on top of your cake.
- Add the remaining chocolate ganache to a piping bag with a small round nozzle or to a disposable bag and cut off a small amount of the tip. Pipe the ganache from the skull’s eyes running down the cheeks to the base of the skull, creating small pools around it.
- Using the remaining buttercream, pipe rose swirls onto the top of the cake using a 1M Wilton tip (or other large star nozzle) and a piping bag.
Notes
- This recipe makes 3 layers of sponge cake using a 6inch tin. If you'd like a bigger cake, you can scale up the recipe by ⅓ to make 3 layers in 8inch tins or double the recipe for 4 layers in 8inch tins.
- You can swap the gluten-free plain flour in this recipe for gluten-free self-raising flour of the same quantity and exclude the baking powder.
Nutrition
Nutritional information is an estimate based on an online nutritional calculator, actual values may vary.

Comments
No Comments