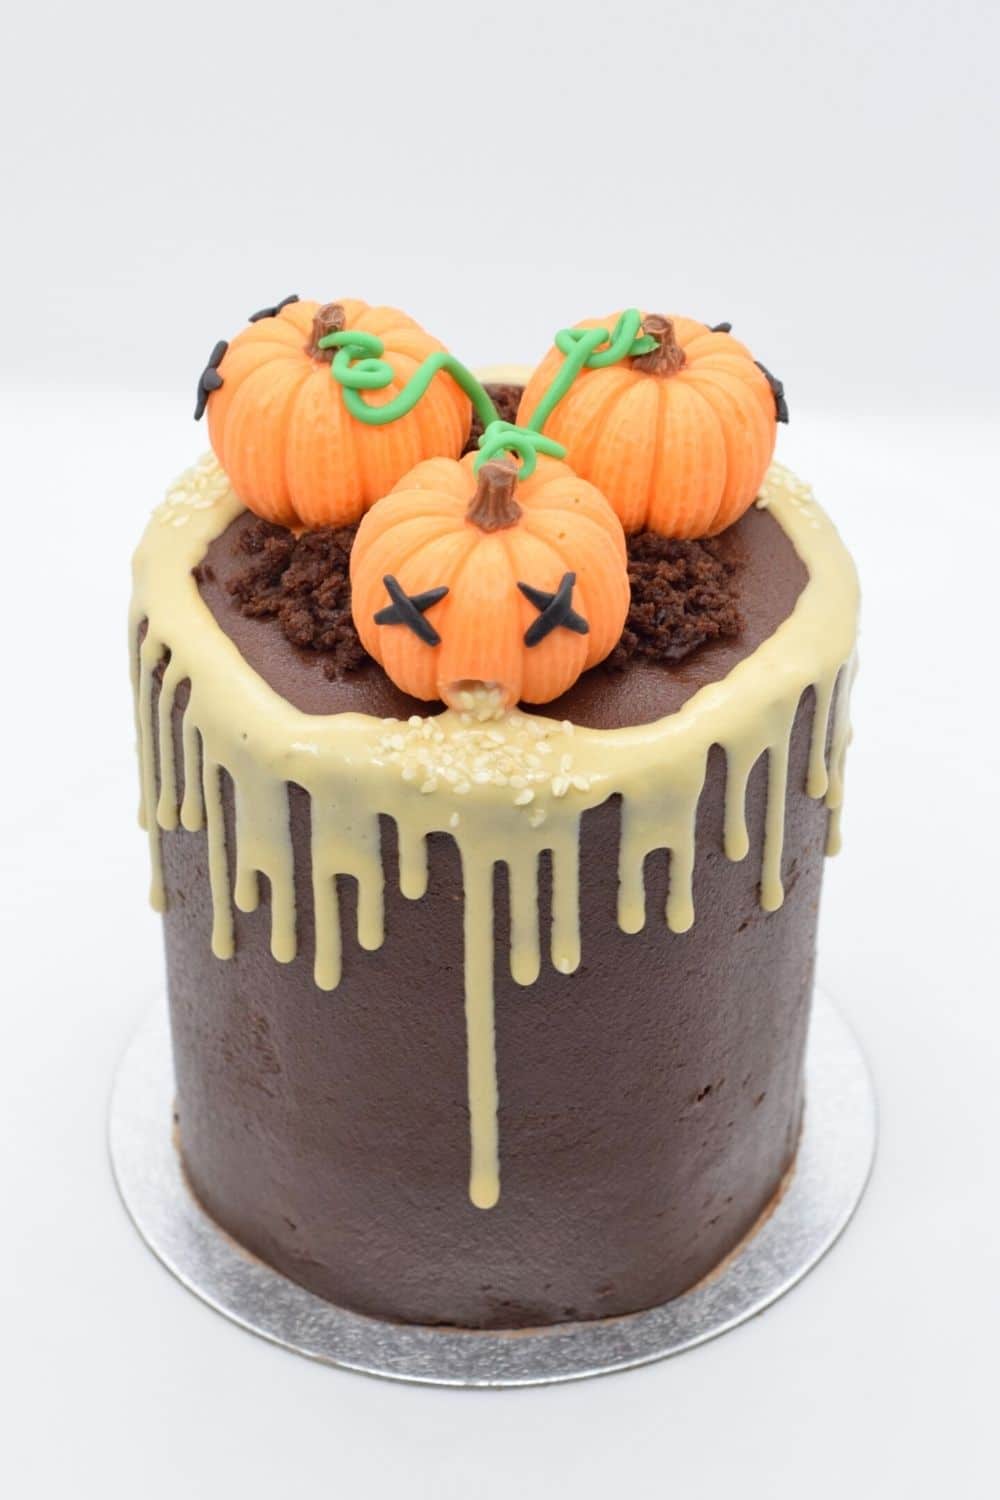
Have you ever seen a pumpkin being sick? Yeah me neither, but this poorly pumpkin patch cake is kind of adorable. This chocolate and tahini drip cake makes an amazing Halloween cake idea, or anytime you feel like poorly pumpkins are appropriate (when are they not?!).
Personally, I think this chocolate tahini cake would make a great idea for an Autumn birthday cake! Who doesn’t love a slightly scary pumpkin topper? It also tastes delish, if I do say so myself.
This poorly pumpkin patch cake is made up of three layers of mini chocolate sponge, easy chocolate buttercream and a tahini white chocolate ganache between layers and dripped on top. The mini cake is also topped with chocolate and candy melt pumpkins, sesame seeds and a fondant icing vine.
Jump to:
✏️ Making a tasty and easy recipe
I got the inspiration for this cake from those funny pumpkin carvings where the pumpkins look like they’re throwing up their seeds and insides. If you haven’t seen these before, give the idea a little google and you’ll see what I mean!
To make a miniature version of the puking pumpkin, I wanted to have seeds to go with it. Sesame seeds look exactly like tiny pumpkin seeds in my view. That’s what gave me the idea of using sesame seeds to decorate this Halloween cake.
From there, I needed something to make the pumpkin vomit. Tahini was the perfect choice for both colour and to match the sesame flavour. However, tahini itself wouldn’t make a great drip because it’s the wrong consistency and can be quite bitter alone. Adding melted white chocolate solved both of those issues! If tahini ganache isn’t already a thing, it should be.
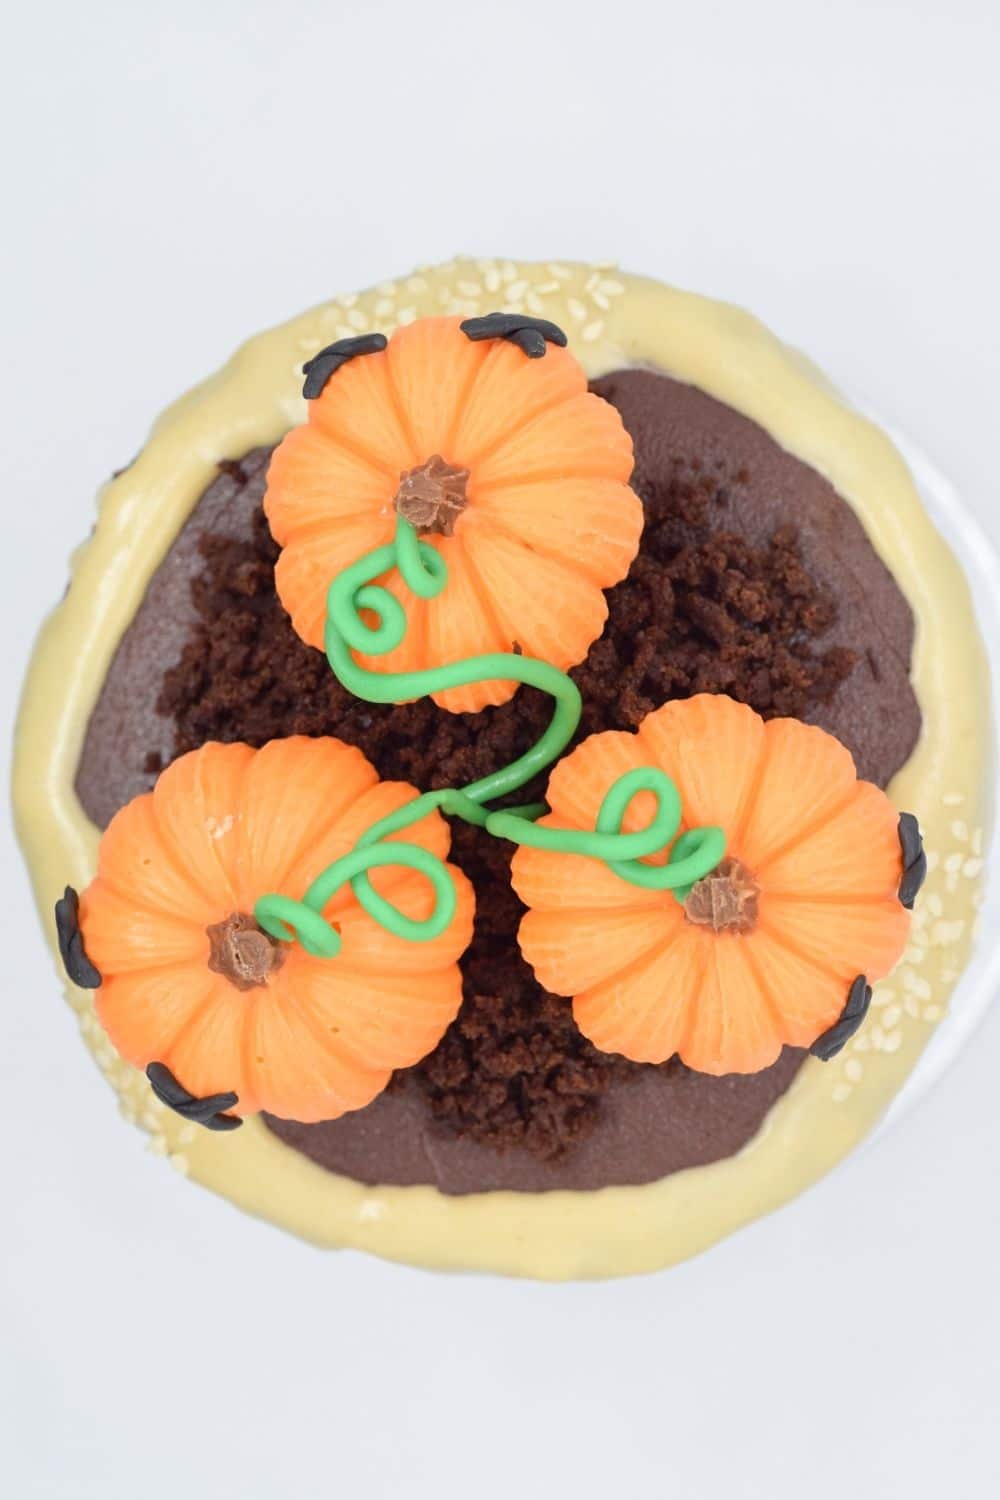
Chocolate buttercream makes a great mud for the pumpkins to sit on and pairs deliciously with the sesame and tahini flavour. I used crumbled offcuts of the cake sponge to create soil on top and a thin bit of green fondant of the vine. All in all, I got far too excited by making a recipe that involved fake sick!
🥘 Ingredients notes
- As with many of my baking recipes, I recommend starting with room temperature ingredients for this chocolate cake and buttercream. This will improve the consistency and ease at which your ingredients will mix together.
- Always sieve your flour, baking powder, cocoa powder and confectioners sugar. I used to be a bit lazy and skip this step, but it really makes such a difference to get you a smooth and lump-free mixture for both your cake sponge and your buttercream.
- When measuring your ingredients, I always recommend using weights rather than cups where possible for greater accuracy. This is especially important for the amount of flour.
🔪 Equipment notes
- I like to use digital scales for weighing my ingredients as it's easier and more accurate than other scales. I'm a fan of KitchenAid or Salter ones!
- It’s good to use measuring spoons for your teaspoon and tablespoon amounts and making sure the scoops filled with your ingredients are levelled before adding them to your mix.
- I like to grease and line my cake pans with greaseproof paper or baking parchment. This will help you get your cake out much easier after they've baked!
🍱 Storage
Your poorly pumpkin patch cake can be stored in an airtight container at room temperature for up to 3 days.
If it's hot where you live, you might want to store it in the fridge instead of room temperature.
You can freeze your cake by wrapping the unfrosted cake layers in plastic wrap (cling film) and a layer of foil then storing it in the freezer for 1-2 months. Your buttercream can also be frozen, in an airtight container. Simply defrost both, re-beat the frosting and decorate your cake.
💭 Top tips for success
Cake making tips:
- When making a cake with raising agents (i.e. using self-raising flour, baking powder, baking soda, etc.), try to not over-mix your cake batter. The texture of your cake will be dense rather than a light and airy sponge.
- Don’t open the oven mid-bake. You’ve probably heard this advice before, but it’s a pretty important tip that it bears repeating. I’ve been there before and nobody likes a cake with a sinkhole!
Buttercream frosting tips:
- When making your chocolate buttercream frosting, make sure to use room temperature butter. Your butter should be soft enough to indent when you press it but not so soft you can squidge all the way in.
- For a gorgeously creamy buttercream, start by beating your butter until it’s light and fluffy. It could just be me, but this always seems to take longer than I think. It should be several minutes of beating the butter if using a stand/electric mixer. This will go a long way in giving you creamy and light frosting.
- When icing your cute tall layer cake, using a cake turntable is a lifesaver! It's so much easier to get smooth sides and top when you use a cake scraper (or bench scraper) and an offset spatula.
3D pumpkin tips:
- When using candy melts, I find they can be quite thick and gloopy when melted. The solution is to thin them out with a little bit of oil. I like to use vegetable oil, or any other neutral flavoured oil, to give it a runnier consistency slightly thicker than melted chocolate. This allows your candy melts to keep their sweet vanilla flavour whilst being easier and smoother to work with.
- To make the mini pumpkins, I used a 3D pumpkin silicone mould. You can get yourself one of these from Amazon (US link, UK link) or other cake craft shops. Some of these don't hold together that well, so I ended up using an elastic band to hold the two halves together when filling them.
Troubleshooting help:
If you’ve got any specific questions on making your Halloween poorly pumpkin patch cake, please feel free to leave a comment below and I’ll try my best to help out.
Alternatively, you can get in touch via my Facebook, Instagram or Pinterest – I’d love to hear from you!
♻️ Alternatives and substitutions
3D pumpkins:
You can use either candy melts or real chocolate for your mini pumpkins. I find it easier to work with candy melts, such as PME's candy buttons, as sometimes chocolate can be tricky and leave white streaks if it’s not melted slow enough. Candy melts are also readily available in orange colour.
However, I think real chocolate tastes better than candy melts. If you use fancy couverture chocolate, such as these Callebaut white chocolate and milk chocolate callets, then you don't need to temper your chocolate. It's much easier to use these to melt down for your mini pumpkins than other types of chocolate.
Chocolate requires a powder or oil-based food colouring to change the colours, as regular water-based colourings will cause it to seize up. You can use white chocolate for your pumpkin and color this orange.
Here I’ve used a small amount of milk chocolate for the pumpkin stalk, adding this first into the silicone 3D pumpkin mould. After this stalk part set, I then added melted orange candy melts for the rest of the pumpkin.
Poorly pumpkin patch decorations:
To create a poorly pumpkin patch theme, I placed the 3D pumpkin on a bed of crumbled chocolate sponge cake for "soil". This was from the offcuts of the chocolate sponge cake layers.
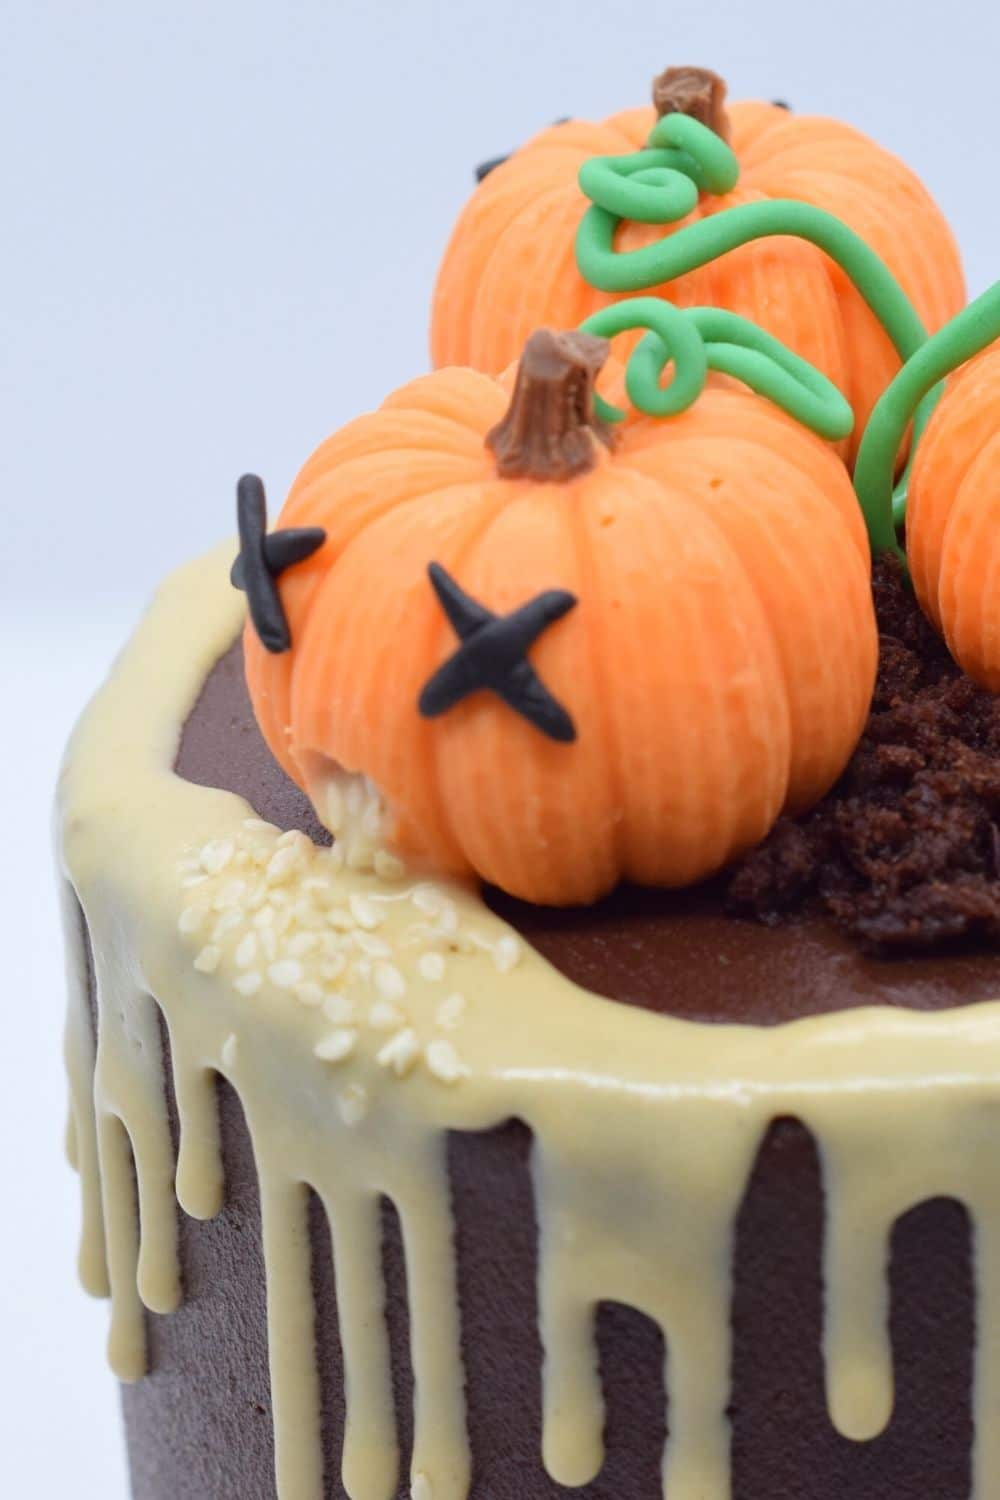
I then placed the 3D pumpkins on the soil and carved a small hole in one side for the mouth. I made two cross-shaped eyes from black fondant icing and stuck these to the poorly pumpkin's face with a bit of water to make them stick.
Next I created a tahini white chocolate ganache drip. I dripped this around the cake's top edge and filled it in the pumpkin's mouths.
I also like to throw in some sesame seeds on top of the tahini drip to look like mini pumpkin seeds.
Lastly, I made a small vine of green fondant icing to loop around the pumpkin stalks.
This poorly pumpkin style is completely optional though, and you can have your pumpkins happy and healthy if you'd like!
Gluten-free option:
For a gluten-free option, simply swap the flour in the cake sponge recipe for a gluten-free flour blend or the same quantity.
I usually recommend a good one-to-one pre-mixed blend such as King Arthur's measure for measure flour or Freee from Doves Farm.
Be sure to check that the other ingredients you are using are definitely gluten-free though, as some items may be subject to cross-contamination depending on the brand.
Cake pans to use:
This recipe is for a 3-layer cake using three 4inch / 10cm size cake pans. I find this serves 2-6 people, depending on how hungry you are. I also call it a couple cake!
If you only have two 4inch / 10cm size cake pans, you can instead split the cake batter over these two pans and cut each in half for four layers. Bake your cakes for an extra 5mins if doing this.
If you’ve not got this size of cake pan, you can easily swap this for two layers of the 6inch / 15cm size.
Alternatively, double up the recipe for three thick layers of 6inch / 15cm for an impressively tall cake! You'll need to bake your sponges for an extra 10mins if doing this.
🧁 Other goodies
So, I definitely recommend that you whip up a Halloween poorly pumpkin patch cake! But as an avid home baker, I’m sure you’re asking yourself “what next?”.
Love all things cute and creepy, spectacular and spooky? For more Halloween-themed delights, check out my recipe for a gluten-free tequila rose skull cake, scary unicorn cakesicles or spooky spiderweb orange vanilla mini cake – no tricks, just treats.
If you love chocolate-flavoured goodies, take a look at my recipe for easy Terry’s chocolate orange cupcakes or one of my all-time favourites slutty brownies.
Developed a taste for tahini? My recipe for black sesame shortbread with a matcha chocolate dip is sure to have you in sesame heaven!
Looking forward to some new recipes? Check out my Facebook, Instagram and Pinterest pages for a few sneak peeks and some sweet inspiration!
Or if you’d like to hear about our latest recipes, why not subscribe to our newsletter?
📖 Recipe
Poorly Pumpkin Patch Cake
Rate this recipe here:
Equipment
Ingredients
Chocolate sponge:
- 2 tablespoon (25 g) dark chocolate
- 4½ tablespoon (65 ml) vegetable oil (or canola or sunflower oil)
- 1 egg
- ½ cups (125 ml) milk (room temp.)
- 1 teaspoon vanilla extract
- ¾ cups (170 g) caster sugar (golden or white)
- ⅓ cups (25 g) cocoa powder
- 1 cups (115 g) plain / all-purpose flour (see notes for self-raising flour swap)
- 2 teaspoon baking powder
- ⅓ cups (85 ml) hot coffee (or 1 teaspoon instant coffee powder dissolved in ⅓ cup / 85ml hot water)
Tahini ganache filling:
- ¼ cups (60 g) light tahini (hulled)
- ½ cups (60 g) white chocolate
Chocolate buttercream:
- ⅔ cups (150 g) unsalted butter
- 2½ cups (300 g) icing sugar
- 2 tablespoon cocoa powder
- 2-3 tablespoon milk
- ½ teaspoon vanilla extract
Tahini ganache drip:
- 1 tablespoon (15 g) light tahini (hulled)
- 1 tablespoon (15 g) white chocolate
Poorly pumpkin decoration:
- 1 tablespoon milk chocolate (optional)
- ½ cups (105 g) orange candy melts (⅙ cups / 35g per pumpkin)
- 3 - 5 teaspoon vegetable oil (or canola or sunflower oil)
- Black fondant icing
- 2 teaspoon sesame seeds (white / hulled)
- Green fondant icing (optional)
Instructions
Chocolate sponge:
- In a heatproof bowl, slowly heat the chocolate and oil in the microwave (30 secs at a time) and stir until smooth.
- Beat the eggs and sugar together until fluffy, then pour in the chocolate mixture, continuing to mix until combined.
- Gradually add in the milk and vanilla to the mixture, stirring until smooth.
- Sieve in the cocoa powder, flour and baking powder and fold into the mixture until only just combined.
- Gradually add the hot coffee (fresh or instant) to the mixture, stirring as you pour this in. The cake mix will be very liquid.
- Divide the mixture evenly between three lined cake tins and bake for 15-20mins, until the sponges no longer wobble, are springy to touch and a skewer comes out clean. Allow the sponges to cool on the side while you make the ganache filling.
Tahini ganache filling:
- For the tahini filling (not the drip), in a heatproof bowl melt together the tahini and white chocolate in the microwave for 30-60secs, stirring until smooth. Allow the ganache to cool in the fridge while you make the buttercream.
Chocolate buttercream:
- Beat the butter (using an electric mixer or stand mixer) until pale and fluffy. This could take several minutes.
- Sieve in the icing sugar and cocoa powder, beating until combined.
- Add the milk and vanilla extract, then beat until smooth.
Cake assembly and filling:
- Once the sponges have cooled completely, cut off any peaks to give smooth flat tops on all of your layers. You can set aside any offcuts to use for a soil topping for later.
- Spread a layer of buttercream on top of one of your sponges, then pipe a thick border on top (i.e. around the edge). Add half of your tahini ganache filling, smoothing it out within the border.
- Sandwich a second sponge layer on top and repeat the above step before gently pressing the third sponge upside-down on top.
- Smooth a thick layer of buttercream on top of the cake and around the edges, smoothing and scraping until your cake has a relatively thin and neat outside crumb coating. Refrigerate for 15mins.
- Add the remaining buttercream to the top and outside of the cake. Smooth using a spatula and scraper.
Poorly pumpkins:
- For your pumpkins, if you’re using only one mould, use ⅓ of the ingredients at a time and repeat this section for each of the three pumpkins. If using three separate moulds, you can make all of them at one, using the full amount on ingredients listed.
- To create your pumpkins, melt the chocolate in the microwave for 15-30secs, stirring until smooth and carefully pour this into the bottom of your pumpkin mould. Allow this to set in the fridge for 5mins.
- Melt your orange candy melts in the microwave for up to 30secs at a time, stirring between bouts until smooth. Add the oil and stir until you have a smooth melted candy.
- Pour the melted candy into the pumpkin mould and set this in the fridge for 10mins before removing from the mould. If needed, repeat these steps for two more pumpkins.
- Once you have all of your pumpkins set and removed from their moulds, use a small knife to carve out an oval-shaped mouth on each.
- Pinch off a small amount of black fondant icing and roll this into a small log, cutting it into 4 equal lengths. Using two pieces, make a cross pressing gently in the centre to stick them, then brush the back with water and attach this to the pumpkin for an eye. Repeat this step until you have two sets of cross eyes for each pumpkin.
Decorating and tahini ganache drip:
- For the tahini drip, melt the tahini and white chocolate in the microwave for 20-30secs until smooth. Place this in the fridge while you decorate the cake.
- If using, crumble the chocolate sponge offcuts for soil and sprinkle this on top of your cake in the middle, then place your poorly pumpkins in a circle on top of the soil, facing outwards.
- Add your tahini ganache to a piping bag or a disposable sandwich / freezer bag and cut off the corner.
- Test a ganache drip at the top edge of your cake. If this creates a thick line and only runs partway down the side, you’re good to go. If it hits the bottom, leave your ganache to cool for 5mins and try another test drip. If it’s too thick to run, microwave for another 5secs (in the piping bag if microwave safe or empty back into your bowl to heat). Repeat until your test drips are to your liking.
- Drip the ganache at the top edges of your cake until you have enough drips circling your whole cake, then pipe the ganache into the pumpkins’ mouths, connecting them to your ganache at the cake edge.
- Sprinkle sesame seeds into the pumpkins' mouth and in little pools at their base. As an optional extra, you can create a vine by shaping green fondant icing into thin cylinders.
Nutrition
Nutritional information is an estimate based on an online nutritional calculator, actual values may vary.

Comments
No Comments