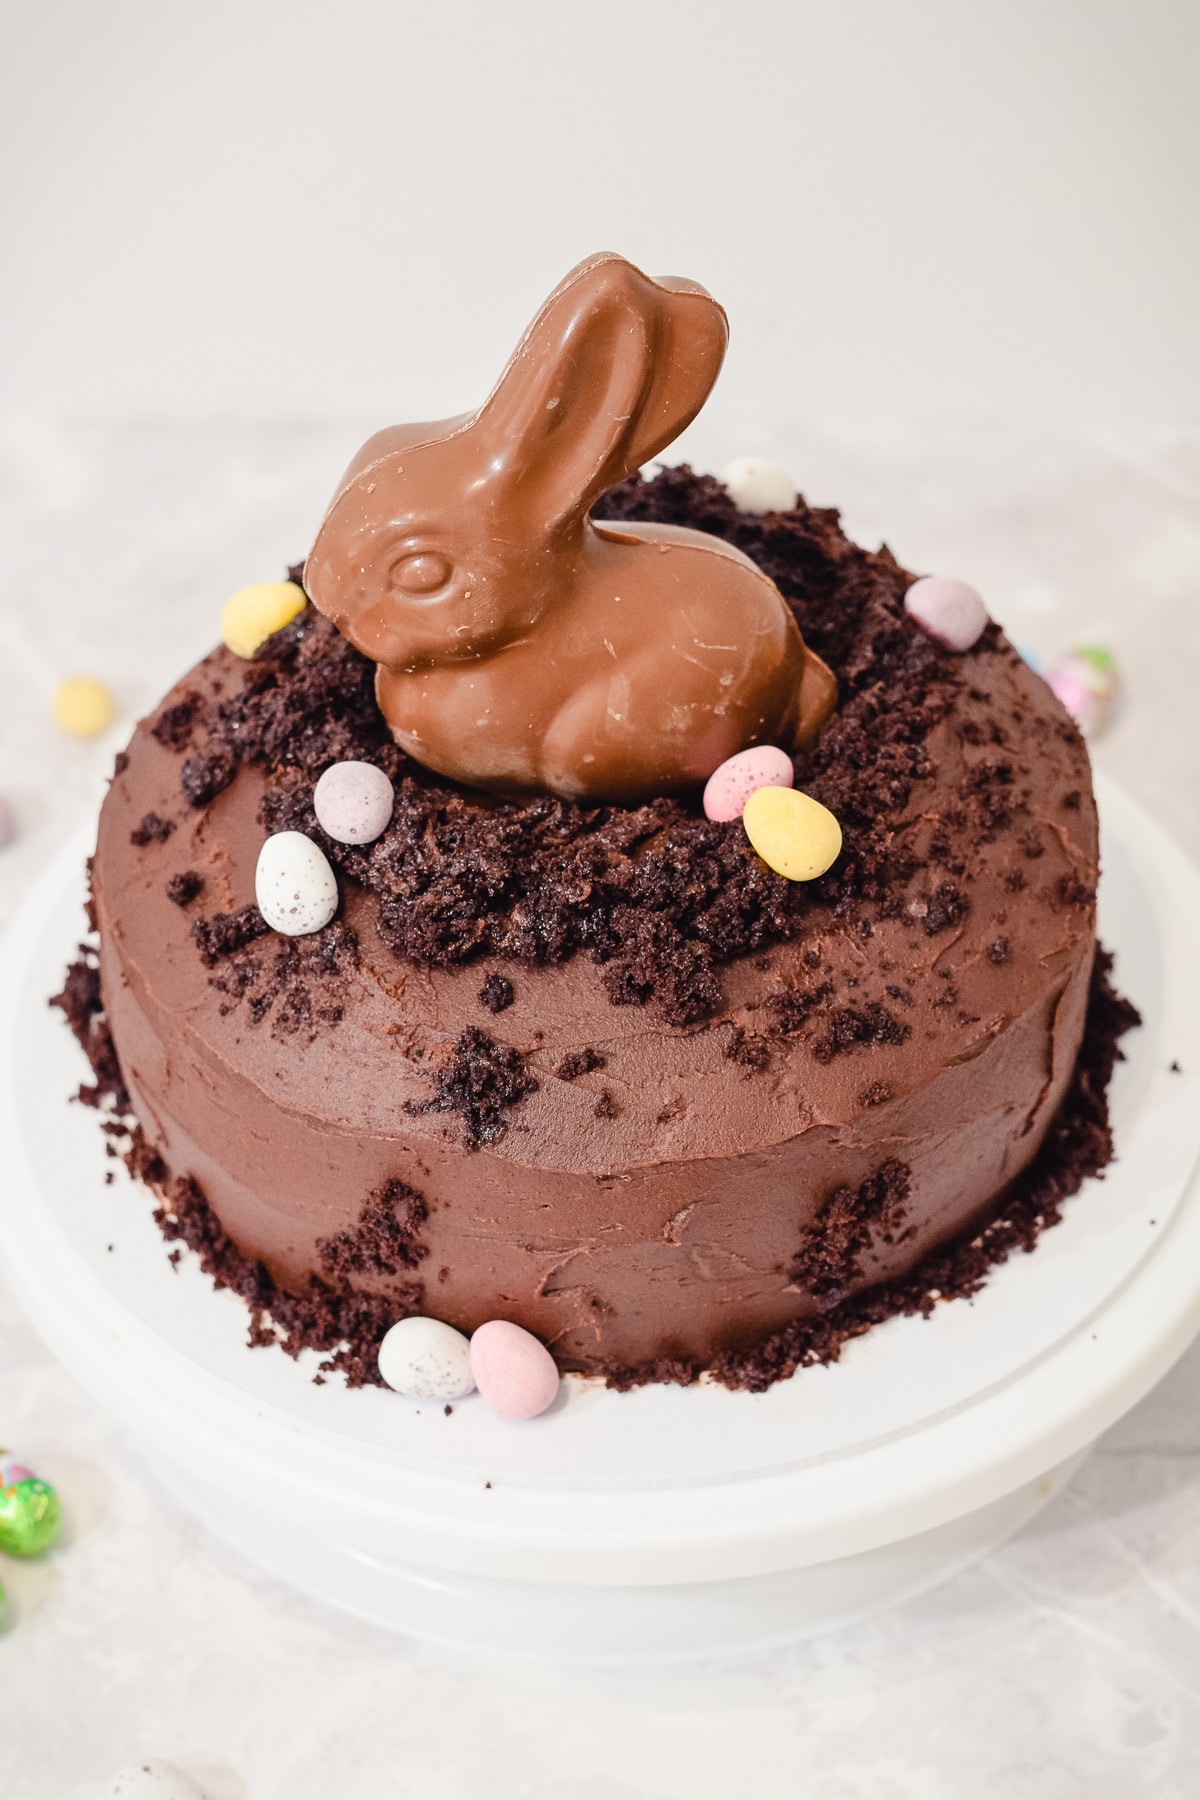
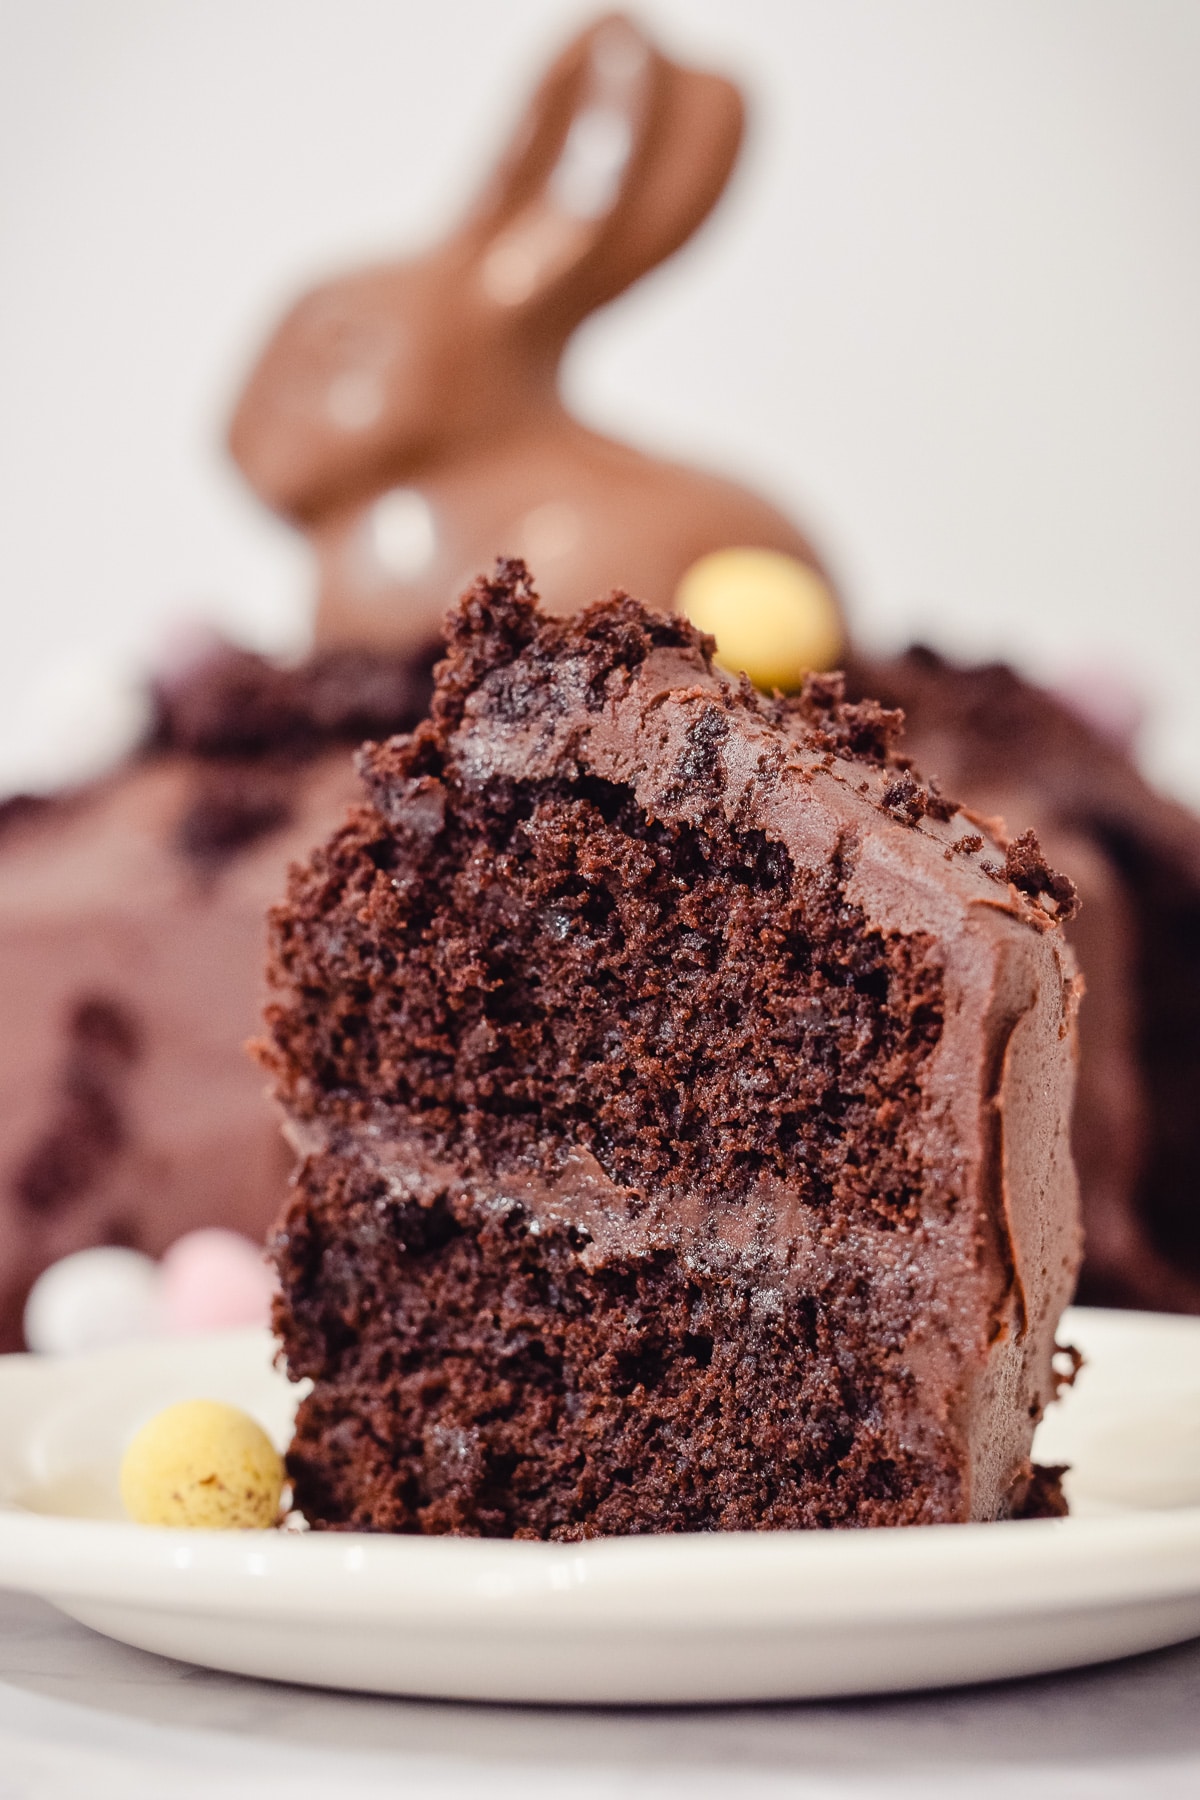
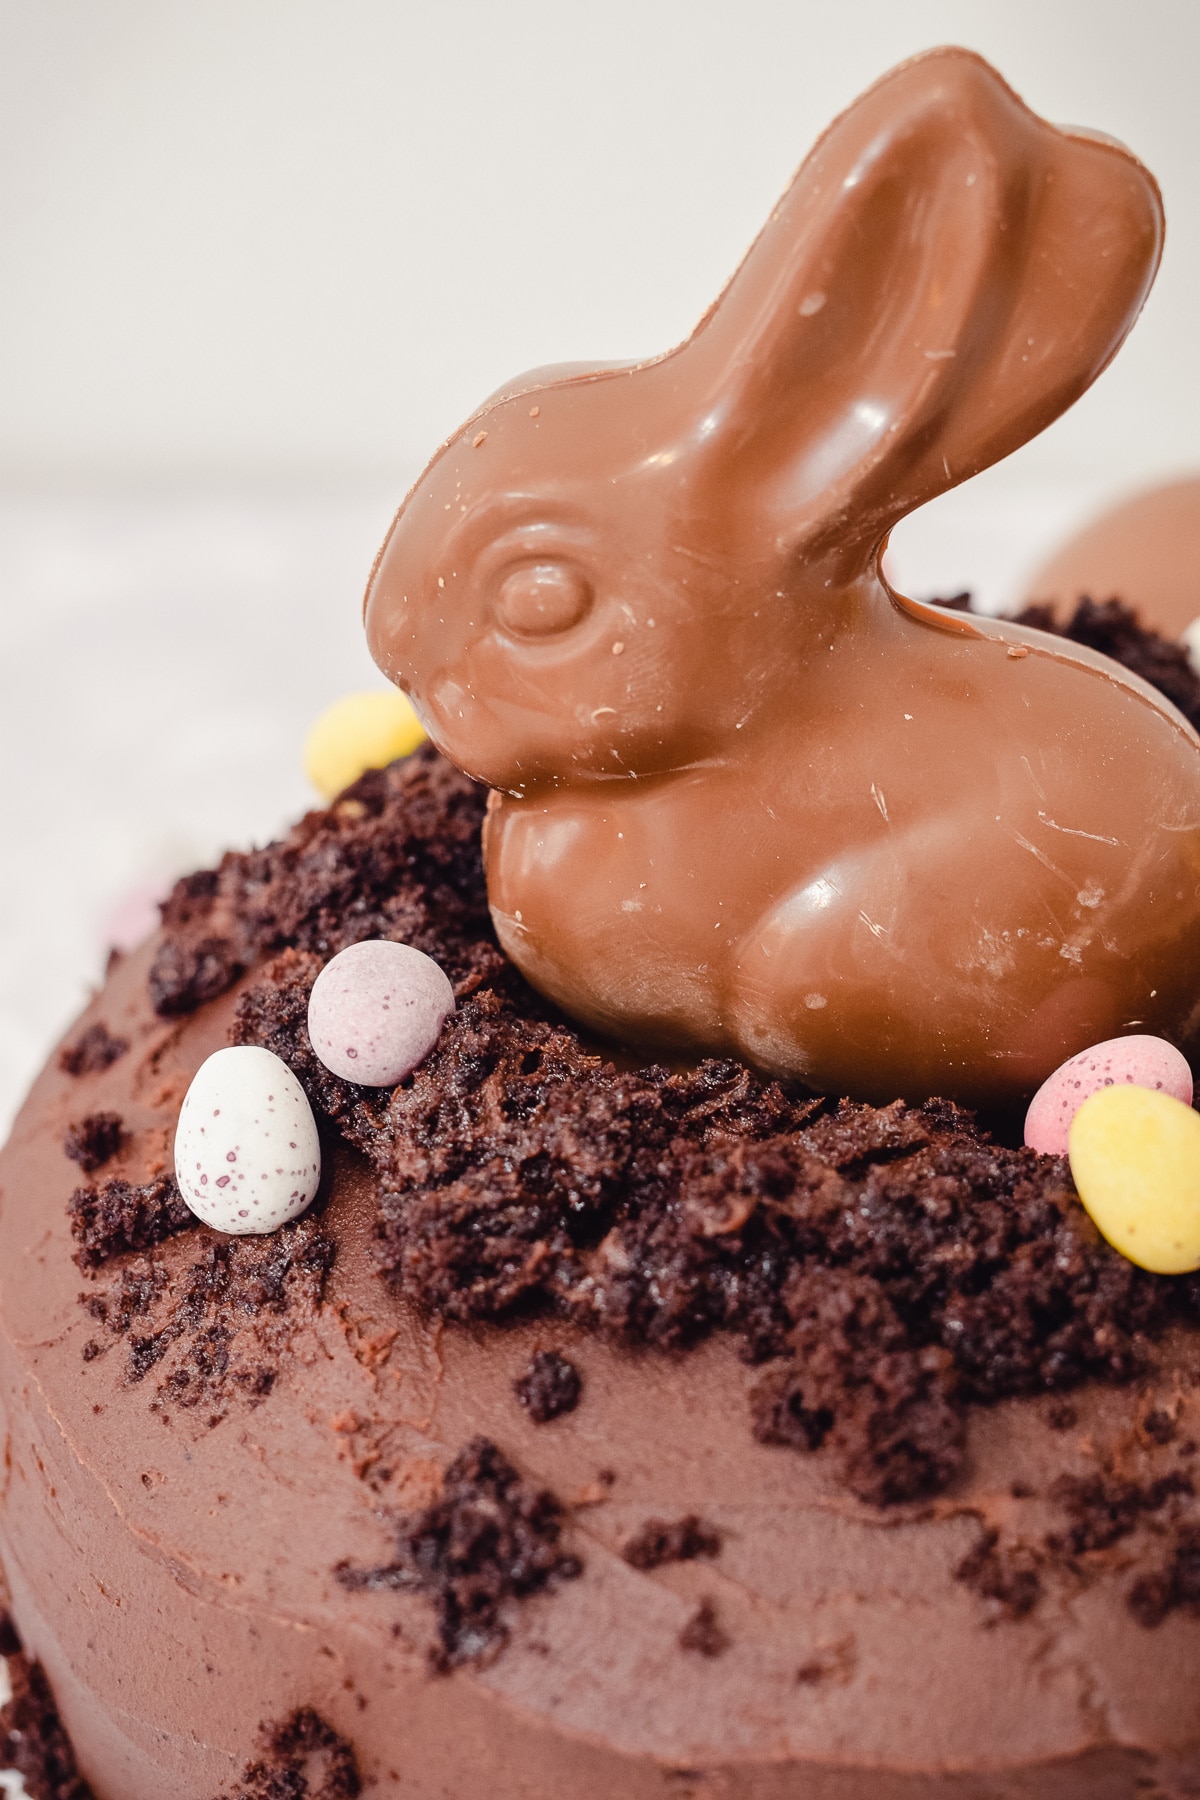
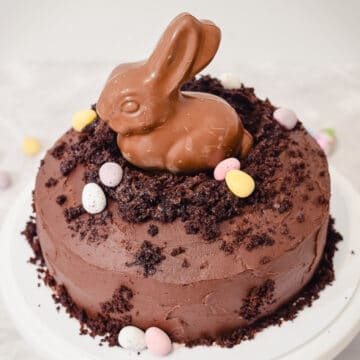
Bounce into Easter with this adorable chocolate Easter bunny cake. It's made from two layers of moist chocolate sponge with an easy chocolate buttercream and a muddy chocolate bunny rabbit burrowing in the middle. Top with a few mini eggs for the full Easter effect!
Jump to:
✏️ Recipe creation
I love Easter baking, and one of my favorite bunny cake ideas was to have a chocolate rabbit burrowing into the mud without using any fondant icing like other bunny decorations.
Don't get me wrong, I still love a bunny butt or bunny ear cake too!
Making a 2-layer, soft and moist, chocolate mud cake with a chocolate bunny on top was the perfect way to achieve this. It's basically a muddy bunny chocolate mud cake!
It's also super easy because the decorations are store-bought and the buttercream is a simple American style using cocoa powder.
This easy rabbit cake is the perfect Easter themed cake for sharing with friends and family.
It's great for both Easter and birthday parties. A chocolate mud cake with all of the flavour and a super simple design.
🥘 Ingredients

This cake recipe calls for the following ingredients:
1. Chocolate cake
- Vegetable oil
- Eggs
- Caster sugar (white finely granulated sugar)
- Vanilla extract
- Milk
- Unsweetened cocoa powder (e.g. Dutch-processed)
- Plain flour (all-purpose flour)
- Baking powder
- Hot coffee
2. Chocolate buttercream
- Unsalted butter
- Icing sugar (powdered confectioners' sugar)
- Unsweetened cocoa powder (e.g. Dutch-processed)
- Milk
- Vanilla extract
- Salt (optional)
3. Decorations
- Chocolate bunny rabbit
- Chocolate mini eggs (optional)
See the recipe card for quantities.
Ingredient substitutions
This recipe uses a chocolate cake and frosting from scratch. However, you can instead swap either the cake or frosting for a store-bought version.
A Lindt bunny is great for the chocolate centrepiece of the cake, but you can use any chocolate rabbit of your choice. I also use Cadbury's mini eggs to decorate, but any of your favourite (or leftover) Easter candy will be cute.
I like to use golden or white caster sugar for this cake recipe, but you can instead swap this for light brown soft sugar instead. This will give it a delicious caramel hint.
Using coffee gives your cake a deeper chocolate flavour. You can swap the freshly brewed coffee for 2 teaspoons of instant coffee dissolved in 100ml of hot water. Caffeinated or decaf!
Alternatively, you can omit the coffee and just use hot water alone instead.
Ingredient tips
- Room temperature ingredients mix together better than cold ones. Take your butter out of the fridge to come up to room temperature before you start making your frosting. For me, this takes about 30mins to warm up.
- Using unsalted butter lets you control the amount of salt in your cake and buttercream. I like mine to be low salt so I don't add much, but you can add an optional ⅛ teaspoon or a pinch of salt to taste in the batter and frosting.
- I recommend sieving your flour, baking powder and powdered sugar (a.k.a icing sugar or confectioners' sugar) for a smooth cake batter and frosting.
- To measure your ingredients, it's best to use weights rather than cups for better accuracy.
- I prefer using vanilla extract to vanilla essence. As it's less processed, it has a purer vanilla flavour.
- Be sure to use an unsweetened cocoa powder (e.g. dutch-process cocoa powder) for baking purposes in this recipe. The ones you'd use for a hot chocolate drink isn't as good for this recipe.
🔪 Equipment
I use the following equipment for this recipe:
- 8inch / 20cm round cake pans (x2)
- Parchment paper (greaseproof paper)
- Electric hand mixer or stand mixer
- Large and medium mixing bowls
- Sieve
- Rubber spatula or wooden spoon
- Whisk or fork
- Weighing scales
- Measuring spoons
- Wire cooling rack
- Offset spatula (optional)
Equipment alternatives
I usually use a stand mixer with the paddle attachment or a hand mixer for the frosting in this recipe because it's nice and easy. You can instead use a whisk, spatula or fork. This might take some elbow grease, though!
I usually make this quite a rustic cake, and I don't level the layers and just slap on the frosting without really smoothing it. The bunny is digging in the mud after all!
However, if you're after a smooth and pro finish, use a cake leveller or knife to cut any domed peaks on your cake. Next, use a cake turntable, offset spatula and cake scraper to decorate your cake. Cover your cake in a crumb coat of frosting first, refrigerate for 15mins, then add another layer of frosting, scraping to smooth.
I usually use two round 8-inch cake pans for this chocolate cake recipe. However, you can instead use two 6-inch cake tins and bake for 5-10mins longer. Your cake will have thicker layers, but it's such a fluffy tender crumb that thick layers are amazing too!
Alternatively, you can also swap the tins for two 9-inch cake pans instead. Scale up your recipe ingredients by an extra ½ and bake for an extra 5-10mins.
Equipment tips
- Before I start baking, I like to prepare my cake tins first. I grease them with butter or cooking oil spray, then line them with greaseproof paper (baking parchment). I use greaseproof paper circles, already pre-cut for the cake tin size, to line the bottoms. You can also use a strip for the sides, but for simple cakes I usually skip this - I'm a lazy baker!
- I like using digital scales for weighing my ingredients as it's easy and accurate. I quite like KitchenAid or Salter scales.
- It's best to use actual measuring spoons. Cutlery teaspoons and tablespoons aren't actually the correct volume - I never knew it before! I'd also recommend levelling off any heaped scoops for a more accurate measurement.
- When using a stand mixer, I like to use the paddle attachment with a medium speed for the buttercream.
- It's a good idea to scrape down the sides and bottom of the stand mixer bowl every so often so you get an even mixture.
- Leave your chocolate cakes to cool in the tin for at least 20mins before transferring them to a wire rack to finish cooling. If they're too warm, the sponges might break when you remove them from the tin.
📖 Method
Chocolate cake
First, preheat the oven to 180°C / 160°C (fan) / Gas Mark 4 / 350°F.
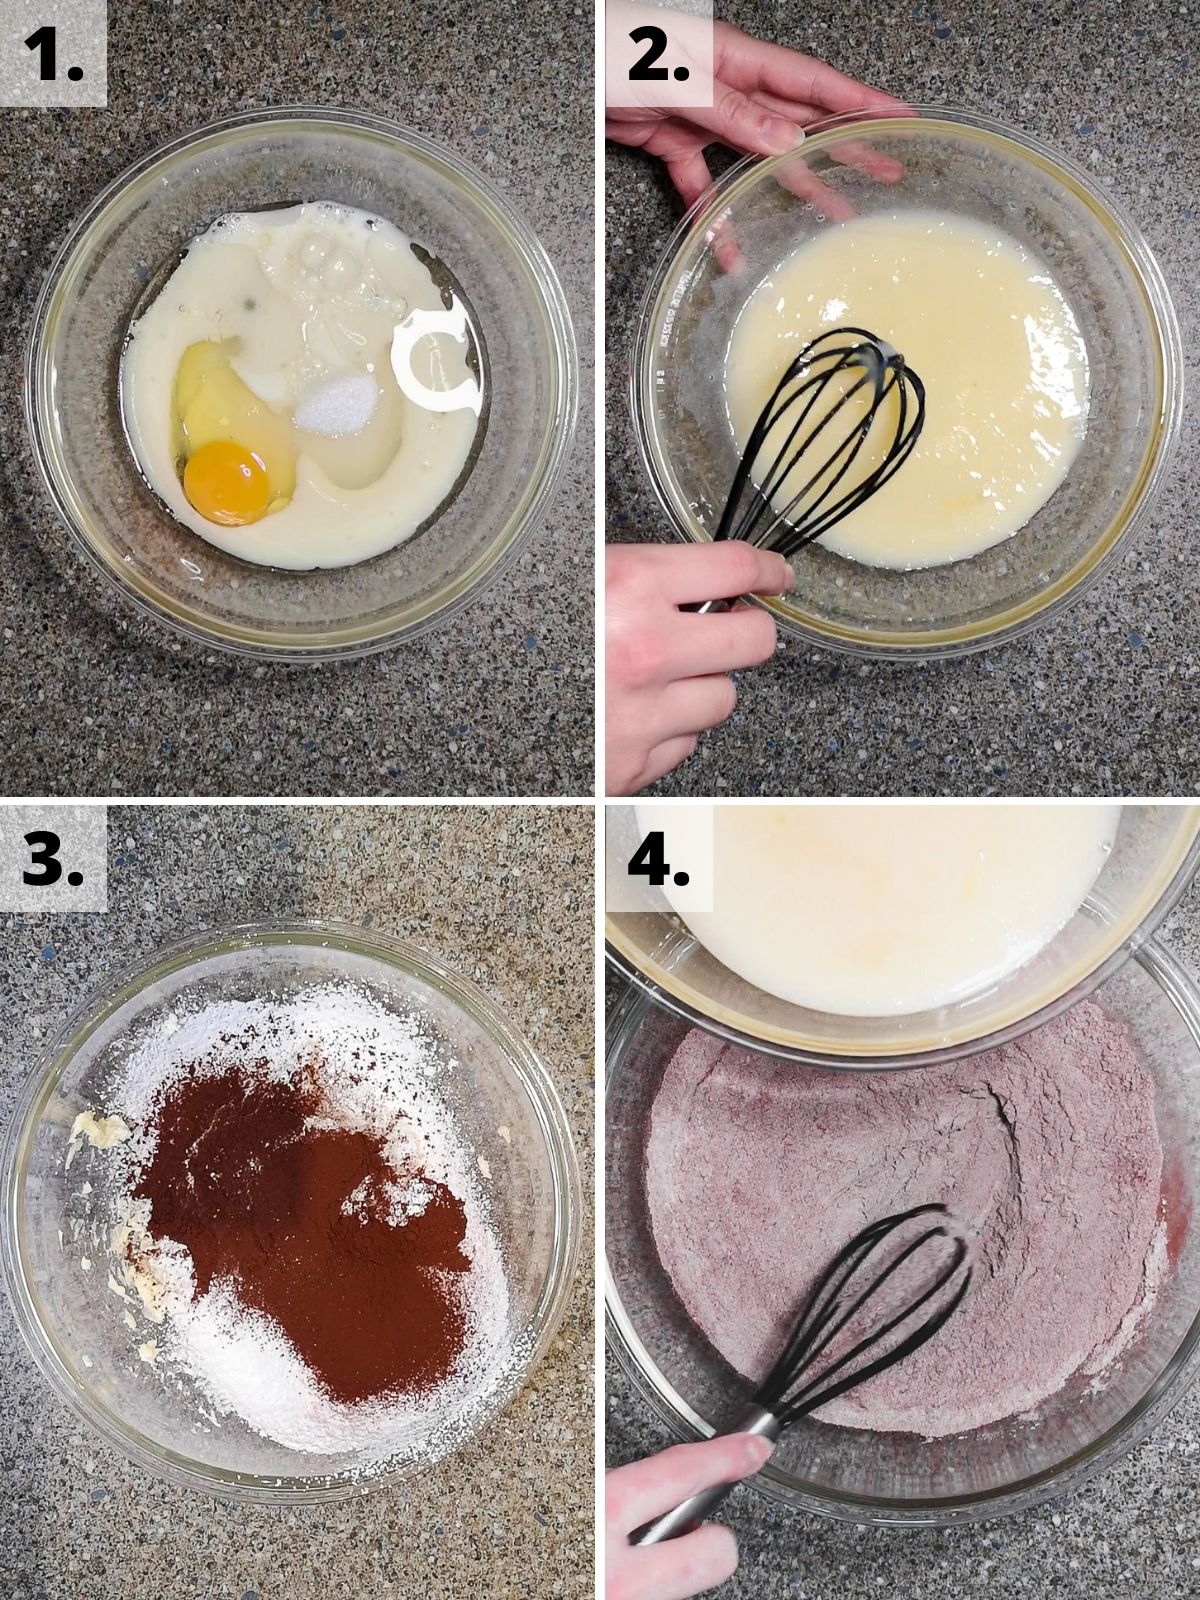
Steps 1 - 2: In a mixing bowl, beat the oil, eggs, sugar, vanilla and milk together until fully combined.
Step 3: In a separate bowl, sieve in the cocoa powder, flour and baking powder and whisk them together.
Steps 4 - 5: Gradually pour the wet ingredients into the dry, stirring together as you pour until just combined. There may be a few small lumps left, but that's ok.
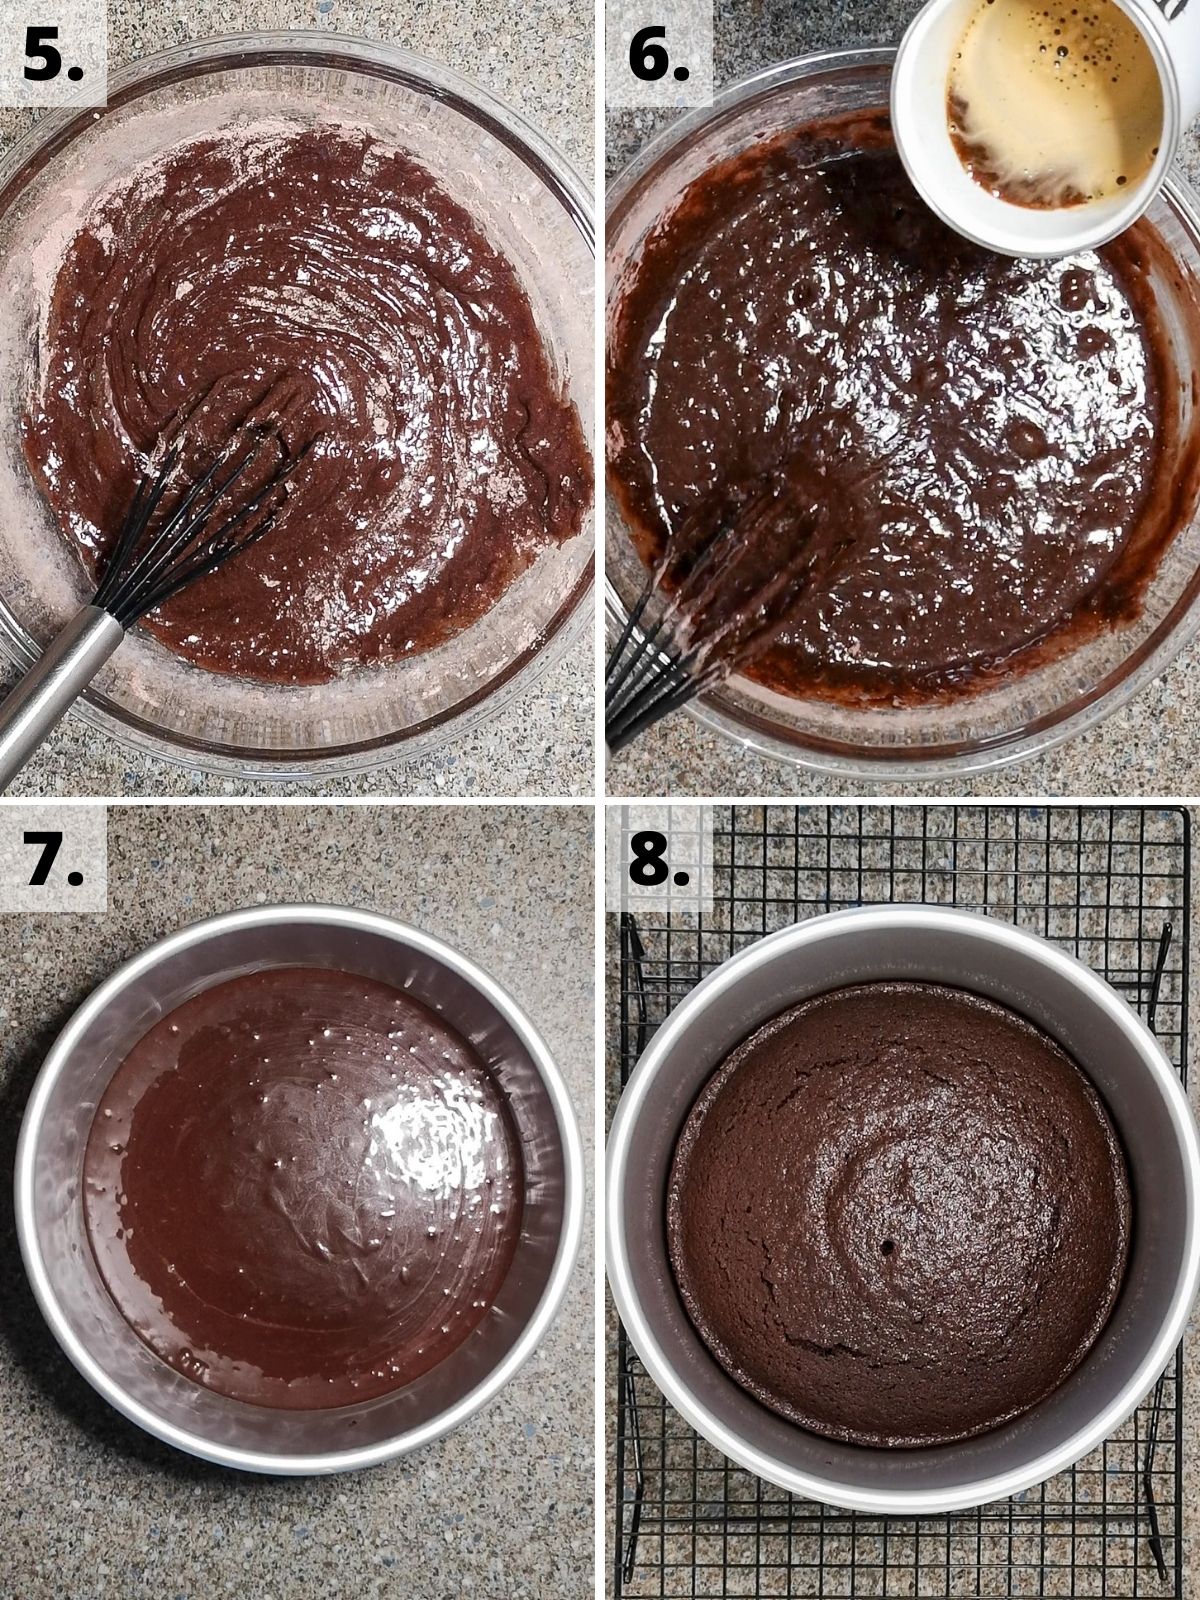
Step 6: Slowly add the hot coffee into the cake batter, mixing as you pour until the liquid has only just combined.
Step 7: Divide the cake mix evenly between two lined and greased 8-inch prepared cake pans. Bake for 25-30mins until they're springy to touch and a skewer comes out clean from the centre.
Step 8: Allow the cake to cool for 15mins before removing from the tins and transferring to a wire rack to finish cooling. While the cakes cool, make the frosting.
Chocolate buttercream
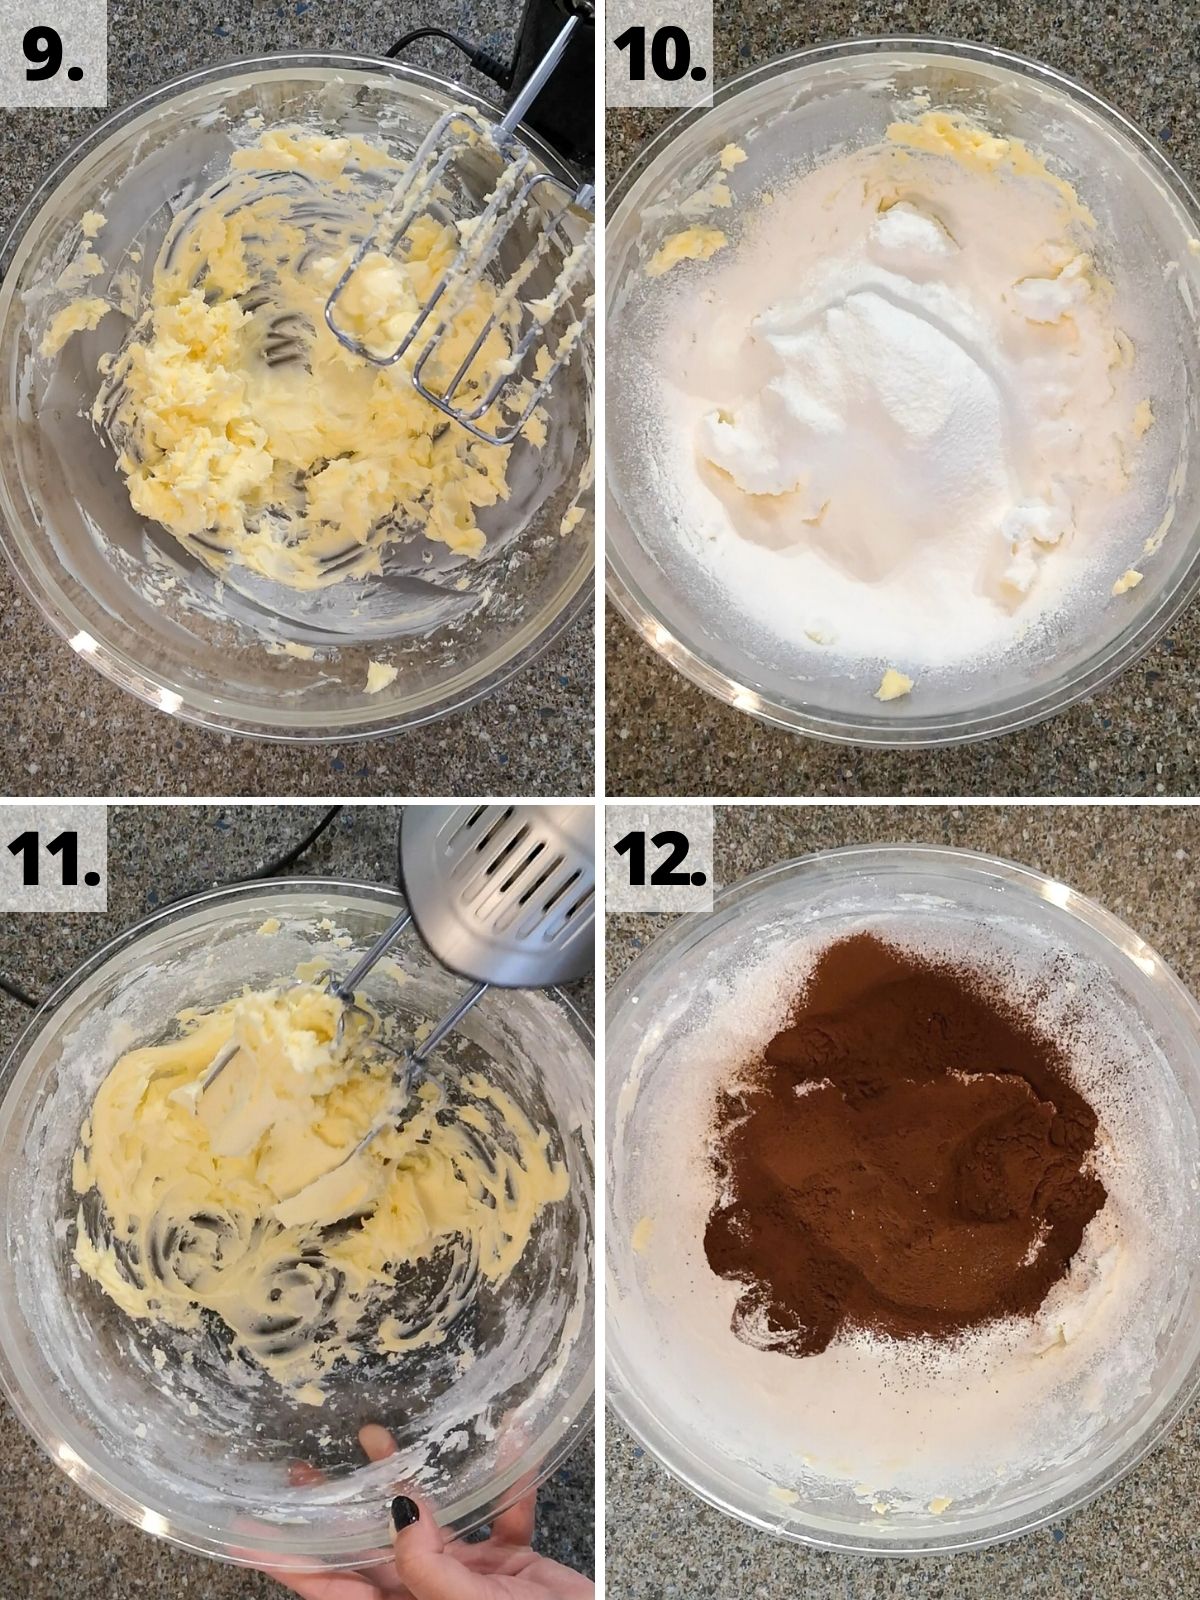
Step 9: Beat the butter (either by hand, using an electric mixer or stand mixer) until pale, light and fluffy.
Steps 10 - 11: Sieve half of the icing sugar and beat until combined.
Step 12: Repeat this with the remaining half of icing sugar and all of the cocoa powder.
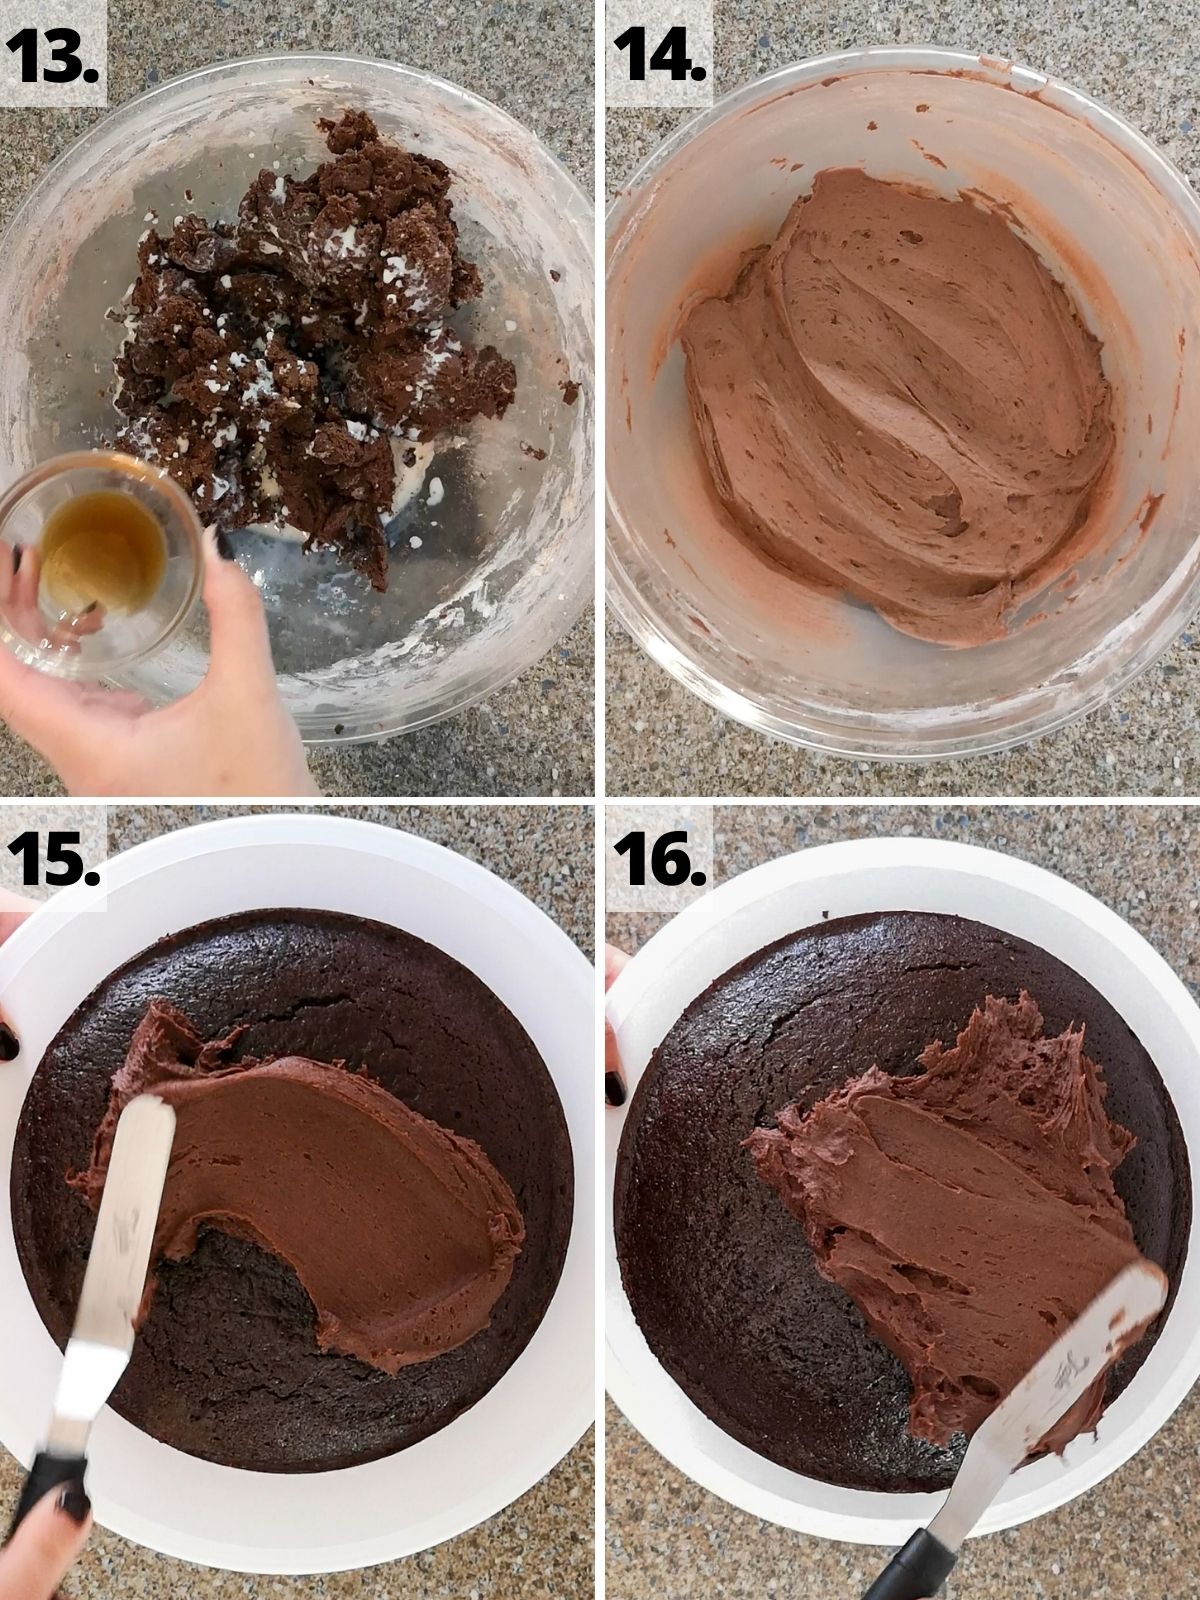
Steps 13 - 14: Add in the milk, salt and vanilla extract, mixing until smooth.
Assembly and decoration
Step 15: Once the cake sponges have cooled, place one onto a flat plate or cake board and spread roughly ⅓ of the frosting on top.
Steps 16 - 17: Place the second sponge on top and cover the cake in the rest of the frosting (top and sides), smoothing lightly with a spatula.
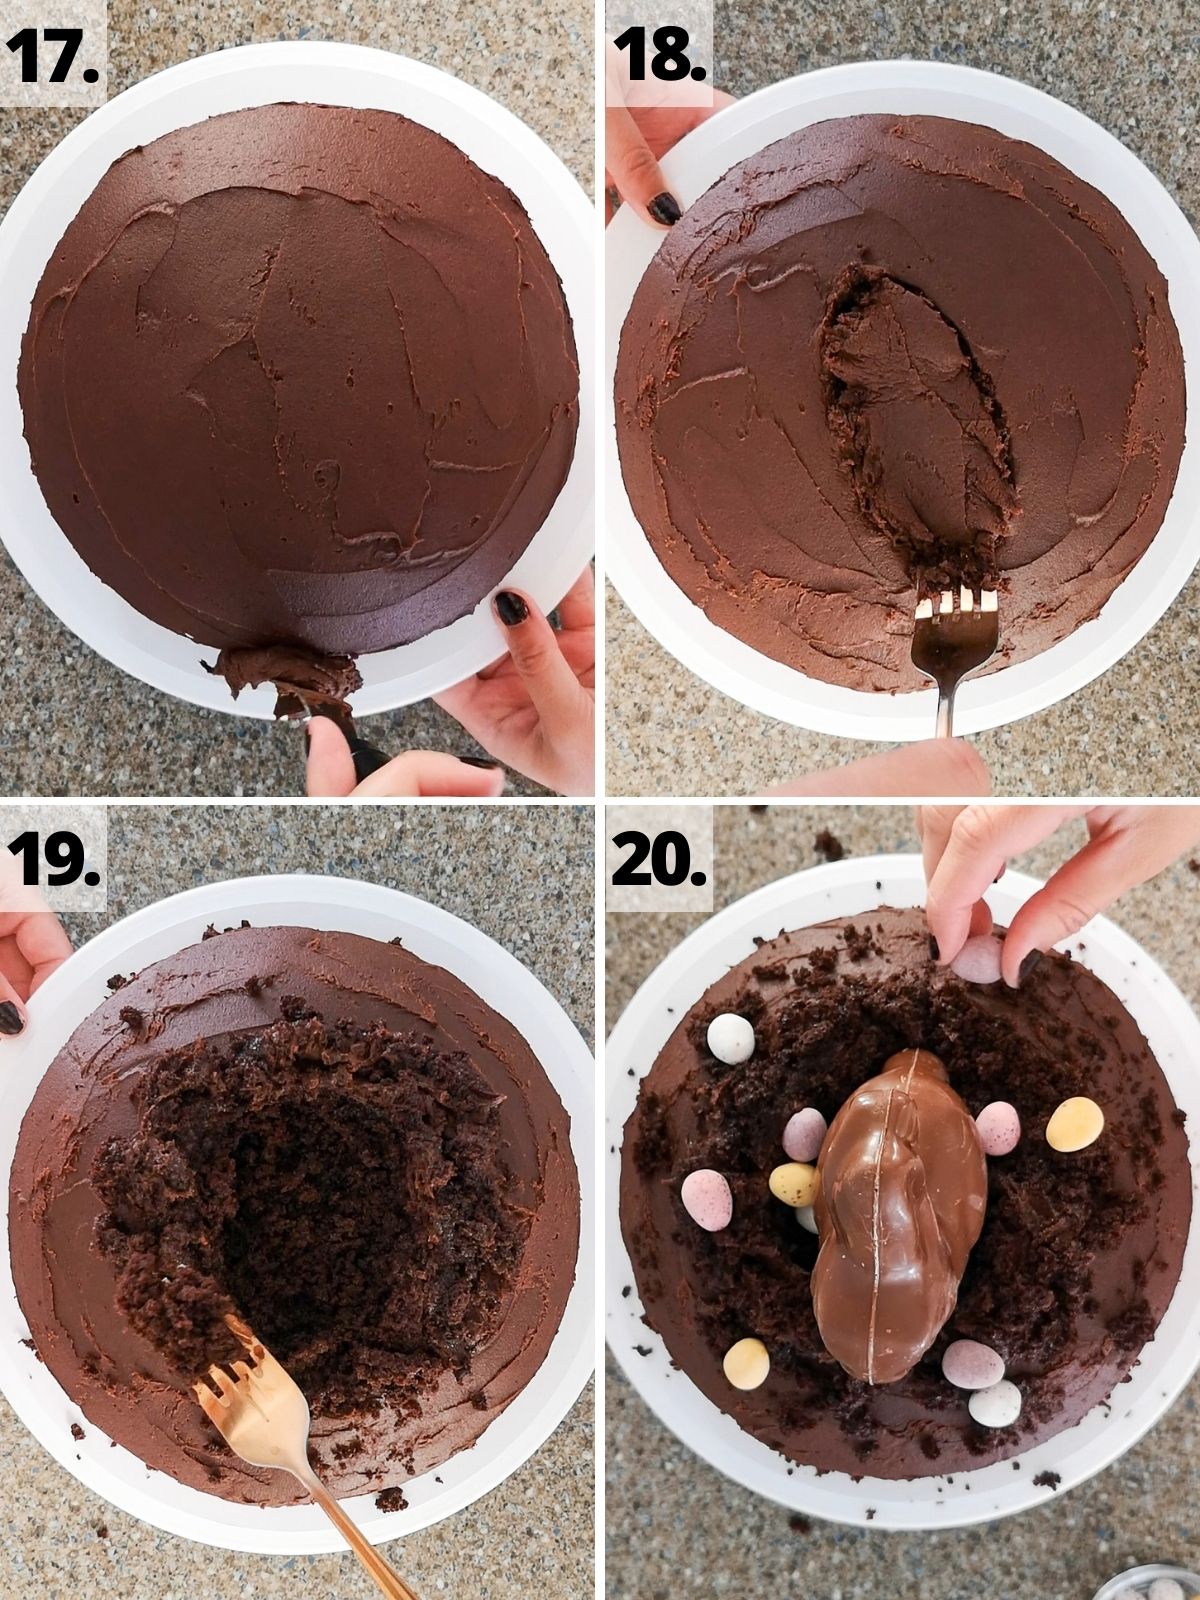
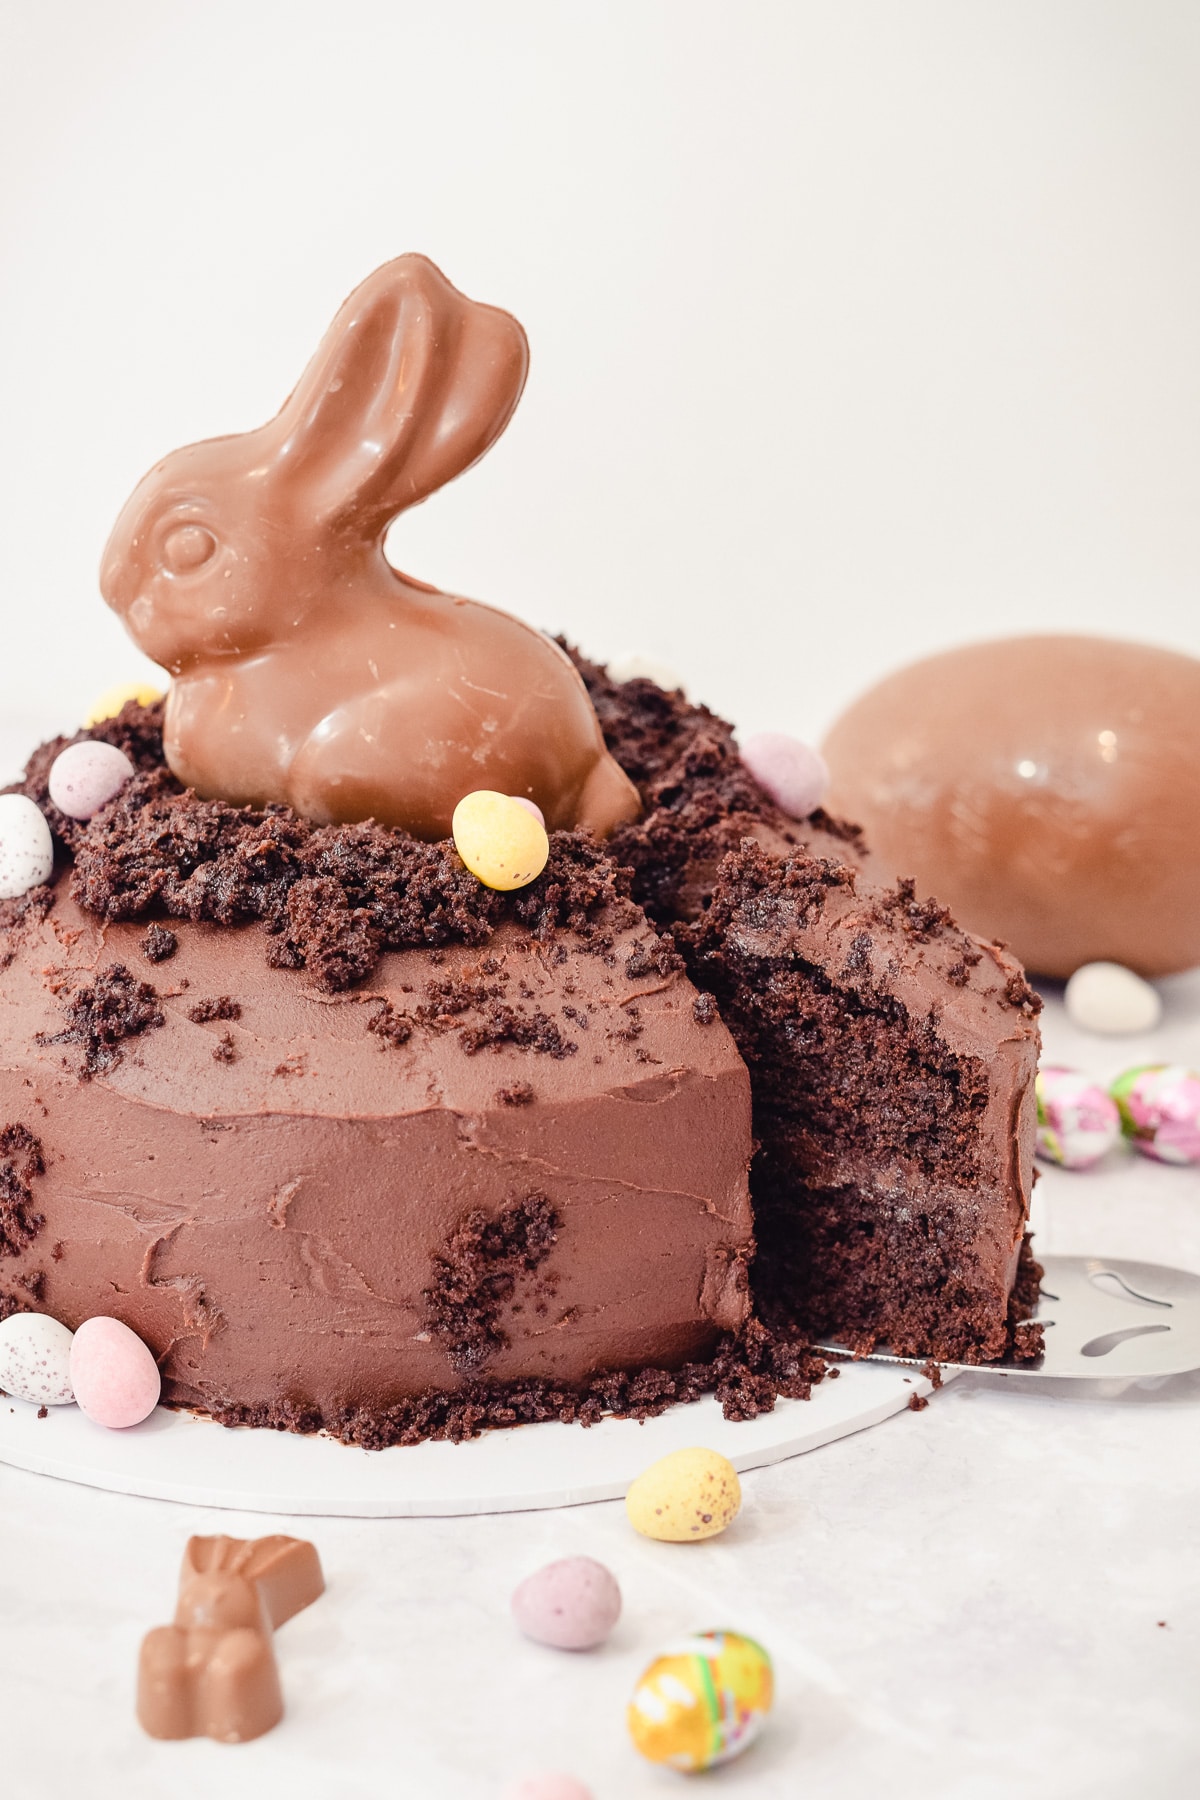
Steps 18 - 19: Using a spoon or fork, dig a hole in the centre of the top of the cake, scattering the crumbs around the edges of the hole and the base of the cake.
Step 20: Place the chocolate bunny inside the hole and decorate the cake with chocolate mini eggs, then enjoy!
🎥 Recipe video
Check out the recipe video below for how to make the best Easter bunny chocolate cake!
💭 Top tips
Chocolate cake
- Recipes with raising agents (eg. self-raising flour, baking powder, etc.) don't like being over-mixed. You'll end up with a dense sponge if you over-mix your cake batter. Try to mix sparingly once you add these ingredients!
- I always position my cake pans in the centre of the oven on the middle shelf when possible. This usually gives a more even bake and my baking temperatures specified in the recipe are based on using this part of the oven.
- Don't open the oven mid-bake. You may have heard this before, but it's such an important factor that it bears repeating. We've all been there and nobody likes their cake layers with sinkholes!
- You'll know your cake sponges are cooked once they're risen and springy to touch. An inserted toothpick or skewer should also come out clean from the centre of the cake.
Chocolate buttercream
- For creamy frosting, beat your butter until it's pale, light and fluffy before adding your other ingredients. This could take several minutes with an electric mixer and longer by hand.
- If you're using an electric mixer, you can sometimes get a cloud of powdered sugar kicked up into the air. To stop this, stir your sieved powdered sugar into the butter with a wooden spoon or spatula briefly before using the electric mixer again. Though if you want to breathe tasty sugar air, I won't judge you!
- If your chocolate frosting is too thick to spread easily, then you can stir in more milk (½ tablespoon at a time) to thin the consistency of the frosting.
- If your frosting is too thin, you can try chilling it in the fridge for 10-20mins before use. Alternatively, you can beat in a few more tablespoons of butter to thicken it. You can also beat in melted chocolate (1 tablespoon at a time) to help thicken your frosting.
❔ FAQs
Your chocolate bunny cake should last for up to 4 days stored in an airtight container at room temperature or up to 5 days in the fridge.
Yes! You can freeze your chocolate cake wrapped in a layer of cling film and layer of foil for up to 3 months.
Your chocolate Easter decorations won't freeze well, so it's best to freeze your cake undecorated (frosted or unfrosted is fine).
Yes, you can make your chocolate sponges ahead of time and freeze them.
Alternatively, you can make the cake layers and/or chocolate buttercream a few days in advance. Your cake layers should be stored wrapped in cling film at room temperature. Your cocoa buttercream should be in an airtight container in the fridge.
This could be caused by a few things. You might have scooped in too much baking powder, e.g. instead of using a levelled scoop from a measuring teaspoon.
Another reason could be that you opened the oven partway through baking which caused your oven temp to drop rapidly and sinkhole your cake.
To get rid of air bubbles in your frosting, beat it on a low speed using a paddle attachment before using it. The whisk attachment can sometimes add too much air.
Alternatively, you can stir it with a spatula or wooden spoon by hand for a few minutes.
No, cake flour is actually different to both plain flour and self-raising flour. It has a different composition and your cake will have a different consistency if you use cake flour.
To make a gluten-free chocolate bunny cake, swap the plain flour for gluten-free flour. I recommend using a gluten-free plain flour blend, such as King Arthur's measure for measure flour or Freee from Doves Farm.
You should also add ½ teaspoon of xantham gum to the chocolate cake batter if your flour blend doesn't already include this in the ingredients.
For gluten-free cake success, add an extra 1 tablespoon oil and 2 tablespoon milk to the batter. Beat your batter really well and let it stand for 30mins before pouring it into your cake tins and baking. You might also need to bake your cakes for an extra 5-10mins.
♻️ Variations
Frosting options
You can swap the chocolate frosting in this recipe for another. I like the idea of using a simple vanilla buttercream and adding a few drops of green food coloring. That way your frosting looks like grass over the chocolate soil of the cake crumbs!
Decorations and toppings
I love decorating this cake with a chocolate bunny half-buried in the chocolate icing like it's been digging into the dirt. Alternatively, you can use another Easter-themed topper like a chick or lamb.
You can also swap the chocolate bunny for another candy like the Easter rabbit Peeps. I also like mixing it up and using a white chocolate bunny rabbit.
Top the chocolate mud cake with all your favorite Easter candies! Like mini cream eggs, galaxy gold eggs, and more!
You can add chocolate chips and crumble Oreos on top of your cake for even more chocolate soil and dirt.
🧁 Other goodies
Looking for some other goodies to make?
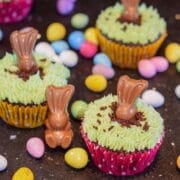
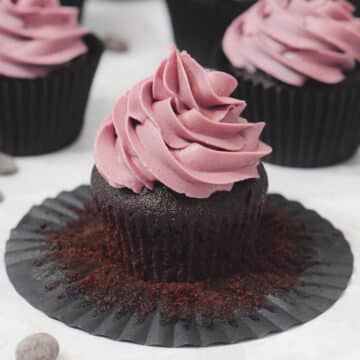
On an Easter egg hunt for more Easter-themed desserts and treats? These malteaser bunny chocolate malt cupcakes pair perfectly with this bunny cake for an Easter party dessert table!
You can also add these best easy mini eggs blondies, mini egg cupcakes or simple creme egg blondies.
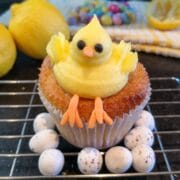
You'll also love these cute Easter lemon vanilla chick cupcakes. The moist vanilla cupcakes are topped with an adorable chick made from lemon buttercream - all you need is a plastic bag or piping bag to make these Easter toppers!
If you're after some more easy layer cake ideas, you might like my tasty chocolate orange cake, which uses fresh orange juice and zest. Or try this simple white chocolate raspberry cake, made with real raspberries for an unbeatable flavor!

Looking forward to some new recipes? Check out my Facebook, Instagram and Pinterest pages for a few sneak peeks and some sweet inspiration!
Or if you'd like to hear about our latest recipes, why not subscribe to our newsletter?
📖 Recipe
Chocolate Bunny Cake
Rate this recipe here:
Equipment
Ingredients
Chocolate Cake:
- 135 ml (½ cups) vegetable oil or other neutral oil e.g. sunflower
- 2 eggs
- 325 g (1 ⅔ cups) caster sugar golden or white
- 2 teaspoon vanilla extract
- 200 ml (1 cups) milk semi-skimmed or whole
- 85 g (1 cups) unsweetened cocoa powder
- 200 g (1 ⅔ cups) plain / all-purpose flour ** see notes for self-raising flour swap
- 3 ½ teaspoon baking powder
- 100 ml (½ cups) hot coffee or 2 teaspoon instant coffee dissolved into 100ml / ½ cup hot water
Chocolate Buttercream:
- 200 g (1 cups) unsalted butter
- 450 g (3 ¾ cups) powdered icing sugar
- 45 g (½ cups) unsweetened cocoa powder
- 3 ½ tablespoon milk semi-skimmed or whole
- 2 teaspoon vanilla extract
- ⅛ teaspoon salt optional
Decorations:
Instructions
Chocolate Cake:
- Preheat oven: 180°C / 160°C (fan) / Gas Mark 4 / 350°F. Grease and line two 8-inch cake tins.
- In a mixing bowl, beat the oil, eggs, sugar, vanilla and milk together until fully combined.
- In a separate bowl, sieve in the cocoa powder, flour and baking powder and whisk them together.
- Gradually pour the wet ingredients into the dry, stirring together as you pour until just combined. There may be a few small lumps left, but that's ok.
- Slowly add the hot coffee into the cake batter, mixing as you pour until the liquid has only just combined.
- Divide the mixture evenly between the two greased and lined cake pans and bake for 25-30mins until risen, springy to the touch and a skewer comes out clean. Allow the cakes to cool in the tins for 15mins before moving to a wire rack to cool further.
Chocolate Buttercream:
- Beat the butter (either by hand, using an electric mixer or stand mixer) until pale, light and fluffy. This could take several minutes.
- Sieve half of the icing sugar into the butter and beat until combined, then repeat this with the remaining half of icing sugar and all of the cocoa powder.
- Add in the milk, salt and vanilla extract, mixing until smooth.
Assembly and Decoration:
- Once the cake sponges have cooled, place one onto a flat plate or cake board and spread roughly ⅓ of the frosting on top.
- Place the second sponge on top and cover the cake in the rest of the frosting (top and sides), smoothing lightly with a spatula.
- Using a spoon or fork, dig a hole in the centre of the top of the cake, scattering the crumbs around the edges of the hole and the base of the cake.
- Place the chocolate bunny inside the hole and decorate the cake with chocolate mini eggs, then enjoy!
Video
Notes
Nutrition
Nutritional information is an estimate based on an online nutritional calculator, actual values may vary.

Comments
No Comments